They have a cool factor that entices and can utterly disable the ability to make a rational purchase decision. More than a few pilots you hang with claim that you’re not a real pilot until you fly tailwheel. Plus, watching one slip down final to a deliciously soft touchdown on a grass runway just plain looks like more fun than is legal in many states. What’s involved with learning to fly a tailwheel machine? Can you rent one once you do so? What’s a good one to buy? Can you get insurance if you decide to buy one?
The quick answers are that the FARs require specific training and an instructor’s endorsement to fly a tailwheel airplane as PIC, some operators that give tailwheel checkouts do rent the airplanes to you once you’ve completed it and the current insurance market means that you will probably have to jump over some manageable hurdles to insure a tailwheel bird if you are under age 60—the hurdles get successively higher once past 60. We’ll go into depth on all of that and more below.
THE REGS
In the early 1990s, responding to the number of runway loss of control (RLOC) takeoff and landing accidents in tailwheel airplanes, the FAA decreed that henceforth, anyone desiring to fly as PIC in an airplane with the steering wheel in the back must receive tailwheel flight training, demonstrate proficiency in specific flight operations and receive an endorsement from a CFI attesting to compliance.
The requirement is currently enshrined in FAR 61.31(i), which says that you must show proficiency in normal and crosswind takeoffs and landings, wheel landings and go-around procedures.
Sounds easy.
Well, um, sorta. It requires concentration and hard work—you aren’t going to be bored. Plus, after flying nosewheel airplanes, you’re going to find that some of the techniques you’ll need to master involve actions and thought processes directly counter to what you’ve been doing for all this time.
Our experience teaching tailwheel flying for over 45 years and talking with scores of tailwheel instructors is that a newbie to the tailwheel world should plan on 10 hours to complete a thorough checkout. Many will finish in less time, but 10 hours is a solid number for planning so that you are unlikely to be surprised by the cost.
GOING FOR IT
The first challenge you’ll face is finding a flight school or FBO that gives tailwheel training. They exist, but you’ll probably need to do a little searching and may have to travel to get to one. The hard reality is that the landing accident rate for tailwheel airplanes is two to three times what it is for nosewheel airplanes—peruse the accident data in the Used Aircraft Guide in back issues of Aviation Consumer for some eye-opening data—and a lot of flight schools that once gave tailwheel training stopped because their trainer(s) were wrecked by renters.
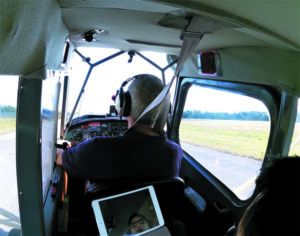
Fortunately, there are still a number of flight schools all around the country that offer tailwheel training and some will combine that training with such things as backcountry operations or aerobatics. Our review found Summit Aviation (www.iflysummit.com) in Bentonville, Arkansas, offering tailwheel training in a Piper J-3 and a Super Cub and a connection to well-known Byrd’s Adventure Center, a backcountry playground with two grass strips. Greg Koontz Aviation (www.gkairshows.com) is a one-person operation with tailwheel training and aerobatic instruction in a Super Decathlon as we’ll as a J-3 Cub in Ashville, Alabama. We also noted Northern Air (www.northernair.biz) in Bonners Ferry, Idaho, an FBO that gives tailwheel training in a Citabria 7KCAB as we’ll as flights into the nearby Idaho backcountry.
Most of the tailwheel training establishments we spoke with said that it’s not uncommon for students to travel to them, so they will work to meet the student’s schedule as we’ll as help them find local lodging.
Cost varies by the type of airplane. Our review disclosed a working average of $200 per hour, dual.
WHAT TO EXPECT
The essence of tailwheel training is pure stick-and-rudder flying with an emphasis on absolute precision in directional control on takeoff and landing along with learning the appropriate pitch attitudes for all flight operations.
We completely agreed with what Greg Koontz, airshow pilot and longtime tailwheel instructor, told us he considered were prerequisites for pilots about to start tailwheel training—show up proficient in crosswind takeoffs and landings, being able to hold airspeed precisely and with an understanding of the coupling of the ailerons and rudder.
Koontz strongly suggested that a tailwheel checkout is not for someone who is getting back into aviation after some time off—it will greatly prolong the process. A nosewheel pilot who wants to get the rust off should do so in a nosewheel airplane and then start a tailwheel checkout.
SYLLABUS
Prior to training, your school should provide you with a syllabus to help you prepare. Based on our experience and interviews with tailwheel training schools and flight instructors, here’s what we think should be included in a tailwheel training course.
• Ground training. Things should start with extended discussion targeted at getting the student to, frankly, change a way of thinking, beginning with developing a visceral understand of what it means to have the center of gravity behind the main landing gear and the need to take action to stop every turn.
The ground and flight training should be tied in with a combination of inculcating an absolute intolerance of imprecision—if the nose isn’t pointed within a degree of where it should be, that problem must be fixed right now, with no delay—and a willingness to put a control to the stop to get the airplane to do what the pilot desires.
• Lesson 1 (each lesson may take more than one flight). On grass for as much of the session as possible—taxiing with stick full aft and ailerons positioned for the wind; use of full rudder as needed; use of brakes; directional control on takeoff; turns and coordination exercises to start getting the pilot used to the relationship between the ailerons and rudder; steep turns; slow flight; power-off and power-on stalls; cross-controlled stalls; three-point landings; bounced landings; introduction to go-arounds.
• Lesson 2. Recovery from swerves while taxiing; emphasize speed and pitch control on approach; introduce crosswind three-point landings; introduce aborted takeoffs, power-off 180 landings and short- and soft-field takeoffs and landings.
• Lesson 3. Introduce wheel landings and recovery from PIO and emergencies at various points in the pattern.
• Lesson 4. Demonstrate proficiency in three-point and wheel landings—with approach speed for wheel landings no more than 5 knots faster than three-point landings; crosswind landings; short- and soft-field takeoffs and landings; go-arounds; emergencies; converting bounced wheel landings (never more than two bounces) into either a go-around or three-point landing.
WHEEL LANDINGS
Our conversations with tailwheel instructors elicited a common concern—the danger of coming in too fast during wheel landings. All had seen wheel landings taught with 10 to 20 knots tacked onto the normal approach speed as we’ll as significant power carried through the flare while the pilot felt for the runway with the tail and speed high. Once the airplane touched down power was cut.
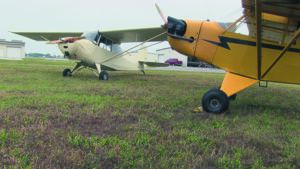
It’s an easy way to do a wheel landing but it’s also an excellent way to wreck airplanes due to the energy that must be controlled during the rollout. If the winds are gusty things can go south fast. Patty Wagstaff, former national aerobatic champion and proprietor of an aerobatic and tailwheel flight school in St. Augustine, Florida (www.pattywagstaff.com), was adamant about approach speed control for wheel landings: “Don’t add more than 5 knots over the approach speed for a three-point landing.”
BEST TRAINING AIRPLANES
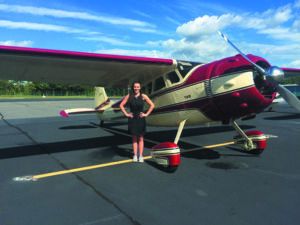
We expected a lot of disagreement between tailwheel CFIs when we asked them which airplanes were the best trainers—but didn’t hear much. Derek DeRuiter of Northwoods Aviation (www.northwoods-aviation.com) in Cadillac, Michigan, told us that he prefers the Piper J-3 Cub although he also likes the Super Cub a great deal.
DeRuiter said that the lower power of the Cub meant that the pilot has to learn directional control on takeoff because it takes some time for the airplane to accelerate. The low stall speed and good ground handling as we’ll as a certain willingness to forgive pilot errors on the ground, particularly on grass, were also mentioned as attributes.
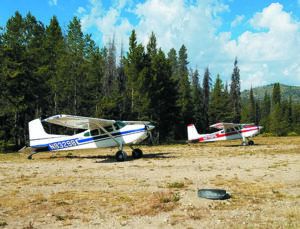
Somewhat surprisingly, DeRuiter said that he liked using the J-3 because it had heel brakes—those little tiny pedals on the floor that are so hard to hit. His reasoning made impeccable sense to us—because they are hard to use in the first place and not very effective in the second, a student is not likely to abuse them and make a bad situation worse—as they too often do with toe brakes. After all, the one thing a student can do that a CFI can’t undo is apply the brakes.
Other instructors, such as Paul Berge (www.paulberge.com) of Indianola, Iowa, has been using an Aeronca Champ—with heel brakes—for tailwheel training for over 30 years, although he recently added a 115-HP Citabria to his training fleet.
The Citabria series is probably the most widely used tailwheel trainer in the U.S. due to a combination of good ground handling and relatively modest operating costs. The Decathlon has the same good ground handling, but with more power, it is more expensive to use as a trainer, although it is commonly used for combination aerobatic and tailwheel training.
As an aside, comments made by Patty Wagstaff and Greg Koontz matched our experience when it came to combination akro and tailwheel training. Pilots who were learning the large control inputs and dramatic pitch and roll changes involved with aerobatics tended to complete an associated tailwheel checkout in substantially less time than those who were just doing a tailwheel checkout.
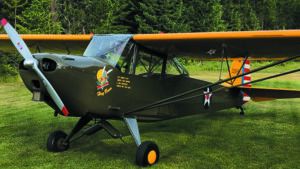
CFIs spoke we’ll of virtually all of the production two-seat tailwheel airplanes as we’ll as the Stinson 108, Cessna 170, Piper Pacer/Clipper and Maule line as initial tailwheel trainers. Those in the warbird community said that the World War II “PT” series—although there was disagreement about the Stearman—were great tailwheel trainers although their value was often high enough that CFIs said it wasn’t a great idea to risk such valuable airplanes for such training.
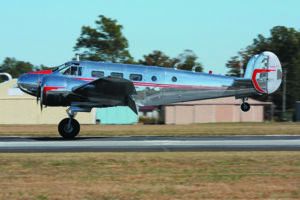
Instructors we spoke with varied on their recommendations of the Luscombe line as trainers. None recommended the Globe Swift as a trainer due to the difficulty in making three-point landings in the marque. In addition, all said that they would not give initial tailwheel training in larger tailwheel birds such as a Cessna 180, 185, 190 or 195, Beech Staggerwing, Spartan Executive and North American T-6 due to their speed, weight/inertia and rapidity in which something could get out of hand before an instructor could do anything about it. All said that they’d do checkouts for pilots in those airplanes after a pilot had received initial tailwheel training and an endorsement in something else.
BEST AIRPLANES TO BUY
When we spoke with CFIs and tailwheel owners we got a multitude of answers. Interestingly, we were not advised to stay away from any specific type of airplane. Respondents said that all have their strong and weak points, but none have truly nasty handling or crazy maintenance costs that warrant avoidance.
What they felt was important was a very careful prebuy examination because a lot of the airplanes are simply old. Corrosion in the tail structure is a big deal for airplanes that sit tail low. For details, we recommend the Used Aircraft Guide for a specific type of airplane in back issues of Aviation Consumer.
We will highlight one major area raised by a many owners when looking at a prospective airplane—make sure that the landing gear is properly aligned. For example, the Cessna 190/195 is a pussycat on the ground so long as the gear is properly aligned. Sadly, it’s common for it to get knocked out of alignment and there are not a lot of maintenance techs who know how to align them. Out of alignment, the airplane can approach uncontrollable on landing—one of the reasons we believe it has the highest rate of RLOC accidents of any airplane we’ve reviewed in the Used Aircraft Guide.
Derek DeRuiter advised us that he’d just looked at the gear of a Cessna 170 an owner was having difficulty with on landing. The left main gear was badly toed in. Once the gear was aligned, the airplane returned to its normal, relatively docile behavior.
For a first tailwheel airplane, we recommend staying away from something with a very high hull value—they’re expensive to insure. Build experience in something less valuable before buying the new Husky.
If you want a warbird, look hard at the “L” (liaison) birds of World War II such as the Taylorcrafts, Stinsons, Pipers and Aeroncas. They have the warbird cachet without the price tag of a P-51.
For just knocking around, we like the lower powered two-place birds. For going someplace efficiently the Cessna 170, especially the large-flap B model, is near the top of the heap and parts are available. By the same token, the Maule line offers a spectrum of engines, allowing them to range from economical traveling machines to serious load-haulers.
We consider the Cessna 180 and 185 to be at the top of the production four-place tailwheel world for their cabin size and load-carrying ability, although they demand a careful checkout from an instructor who knows the breed.
Going into the backcountry? You won’t go wrong with virtually any of the big-engine versions of the two- and four-place production tailwheel airplanes—so long as you are willing to fly them below gross weight.
For more detailed information on tailwheel antiques, classics and warbirds, check back issues of Aviation Consumer; we’ve covered the field.
CONCLUSION
We consider tailwheel flying some of the most fun flying we’ve ever done—so long as it’s approached with hearty respect for its significantly elevated risk of a landing accident, a willingness to take solid initial and regular recurrent training—and a commitment to keep your approach speed under control.


