Anybody old enough to remember the conspiratorial advice whispered to a barely pubescent Dustin Hoffman in The Graduate has dealt with more than enough of the aviation variety to understand all too we’ll why plaaaastics can have a bad name.
After a few years, the notoriously misnamed Royalite and the other members of its genus crack, stain and cast an aura of general shabbiness. Most often, the plastic is replaced outright or painstakingly repaired and painted, but there’s another option which could provide a much classier look for the same cost. Many aircraft interior shops now have the ability to cover all that loathsome plastic with FAA-approved fabric, or even leather.
We checked out the process at Aircraft Interiors by Steve, Inc., at Jetport in Myrtle Beach, South Carolina. Owner Steve Hardwick has been doing aircraft interiors since 1979 and took us through the process.
Clean Up
Plastic refurbishment begins with a thorough solvent cleaning then scuffing of the offending pieces. Cracks are repaired in both types of refit, of course, but if the plastic is to be covered, the repairs are functional rather than finished and, thus, substantially less labor intensive.
The fabric or leather is cut to a rough shape and the plastic piece and the material are sprayed lightly but thoroughly with a contact cement. The show side is attached first and then trimmed. The inside facing and the material are then sprayed again with cement and the material edges are pressed into place. The wall panels in Mooneys can be covered in the same manner.
Stretchy Stuff
The materials utilized in this shop for plastic covering are Eurostretch or Ultraleather, both FAA approved. Eurostretch comes in 10 different colors and is 50 percent wool, 37 percent silk, 9 percent nylon, with a smidgen of something called Elastaine for good measure; hence the stretch in Eurostretch. Predictably, Eurostretch is significantly more pliable than the leather and molds readily to even the curved doorpost facings found in high-wing Cessnas, which the leather cannot. Even headliners can be covered in this manner and the material adheres perfectly to every curve and ridge. Ultraleather has a wider variety of available colors.
Hardwick advises that the glue and installation generally are warrantied for two years, but can be relied upon for a solid six to eight years minimum under most environmental conditions. According to Hardwick, most instances of fabric or leather coming unstuck are the result of surface imperfections in the plastic rather than failure of the glue itself. These can be repaired easily.
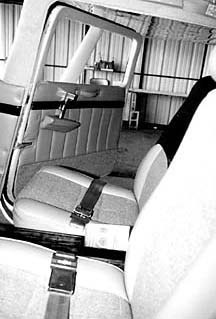
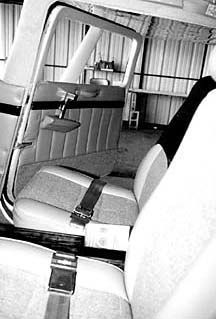
During our visit, we checked out a C-90 undergoing a facelift and the soft grey leather covering applied to the inside surfaces gave us visions of smiling, stiletto-heeled flight attendants serving Dom Perignon in crystal flutes. Unfortunately, the leather doesnt mold as we’ll to curved surfaces like the door post facings in high-wing Cessnas, so youre going to have to settle for a mere wood and silk blend fabric in your C-150. But trust us, the end result is spectacular.
Costs
According to Hardwick, all new plastic for a C-172 will run around $2200 to $2400, installed. Installed is the key here. Kinzie Industries is the Big Kahuna in after-market interior plastic and while the pieces themselves are less expensive that those from Cessna (if you can actually get it from them), the labor required to make them fit eats up the difference.
Refurbishment of the existing plastic runs a solid $1000 to around $1200 for a four-place aircraft, $1600 for a six-placer. We were astonished to learn that the price (at least in this shop) is the same whether you clean, repair, color and reinstall as it is if you go whole hog for leather or fabric covering. (Leather is less forgiving and, even if you don’t have a high-wing Cessna, the plastic must be in good general condition to use Ultraleather.)
The materials for paint are cheaper than the fabric or leather, but the differential is eaten up in most installations by the additional labor required to return uncovered pieces to like new rather than simply functional condition.
Reinstallation will be a little more with material-covered pieces, since the location of screw holes is hidden. On the other hand, the fabric and glue reinforcement should help keep the holes from slipping and cracking in the future.
Hardwick says that some customers report improved noise levels after installation and, with the fabric covering, you can dispense with those nasty bits of Velcro stuck all over your pretty new interior to hold the heat shields in place. You may have to add a few more pieces to the shield to insure security, but the loop side will stick to the fabric very nicely.
Our 182 underwent a complete refurbishment during the last year, including a complete interior overhaul at this shop. We Eurostretched every visible piece of plastic in the interior with the exception of the panel facing, sun visors and the tail cone bulkhead, which were repaired and re-colored. The fabric coordinates perfectly with the carpet, leather and fabric in the remainder of the interior and gives an elegant appearance which has drawn rave reviews.
If youre one of those folks who covers new upholstery with tailored clear vinyl, it probably wouldnt matter one way or the other. Otherwise, when the time comes, wed recommend you look into camouflaging all that plaaaastic with something you’ll be proud to show off to kith and kin. Itll be your little secret that it didnt cost any more.


