It’s easy to gloss over the importance of propeller upkeep. Walk the typical aircraft tiedown area and you’ll see some pretty worn and neglected props.
Rust, gouges and leaking hubs only scratch the surface of problems that you can spot with the naked eye. You should see what a proper propeller teardown reveals and that’s one of many reasons to send a prop to a shop that goes the extra mile to bring a propeller back to like-new standards. By request, here’s a summary of what proper overhauls entail.
Start with the FAA’s guidance
And perhaps some inspecting on your own. For starters, the FAA’s advisory circular AC 20-37E does a pretty good job of laying out the basics of propeller maintenance. At a minimum, this guidance can save money in the long run to increase the service life—and decrease the chance of catastrophic failure—of metal props. On the other hand, composite and wooden propellers are covered by different repair standards.
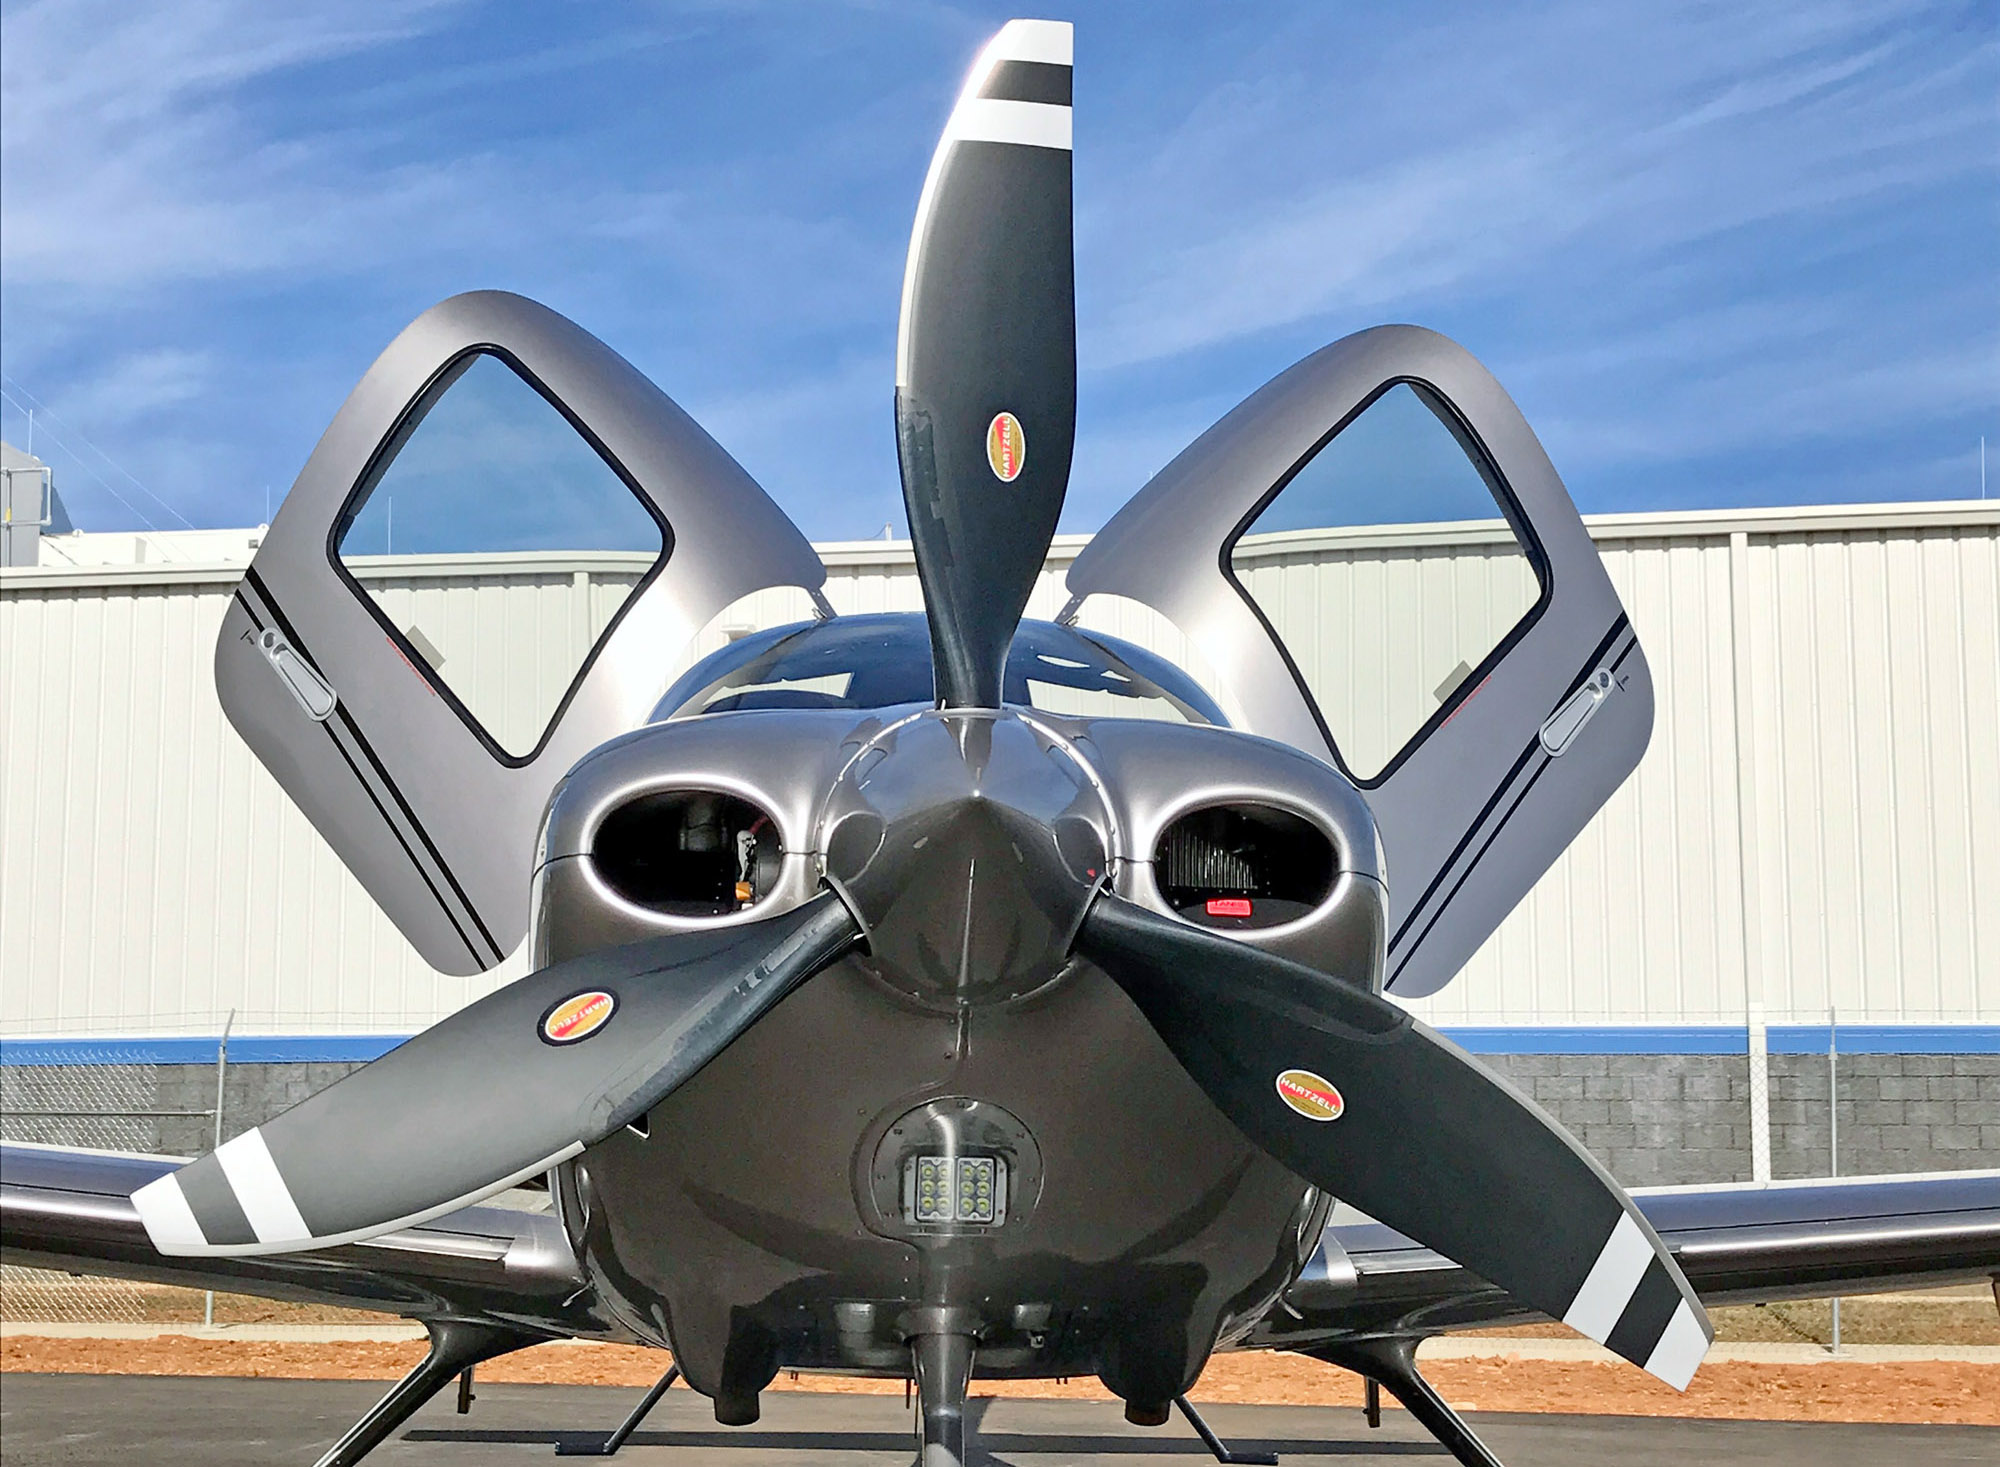
We’ve all been guilty of not really preflighting a propeller the way it should be done. You know—a quick swipe of the hand down the leading edge of the blade to make sure it’s smooth and then moving on. What you’re really looking for are nicks, scratches, dents, erosion, corrosion and cracks. Start with the spinner.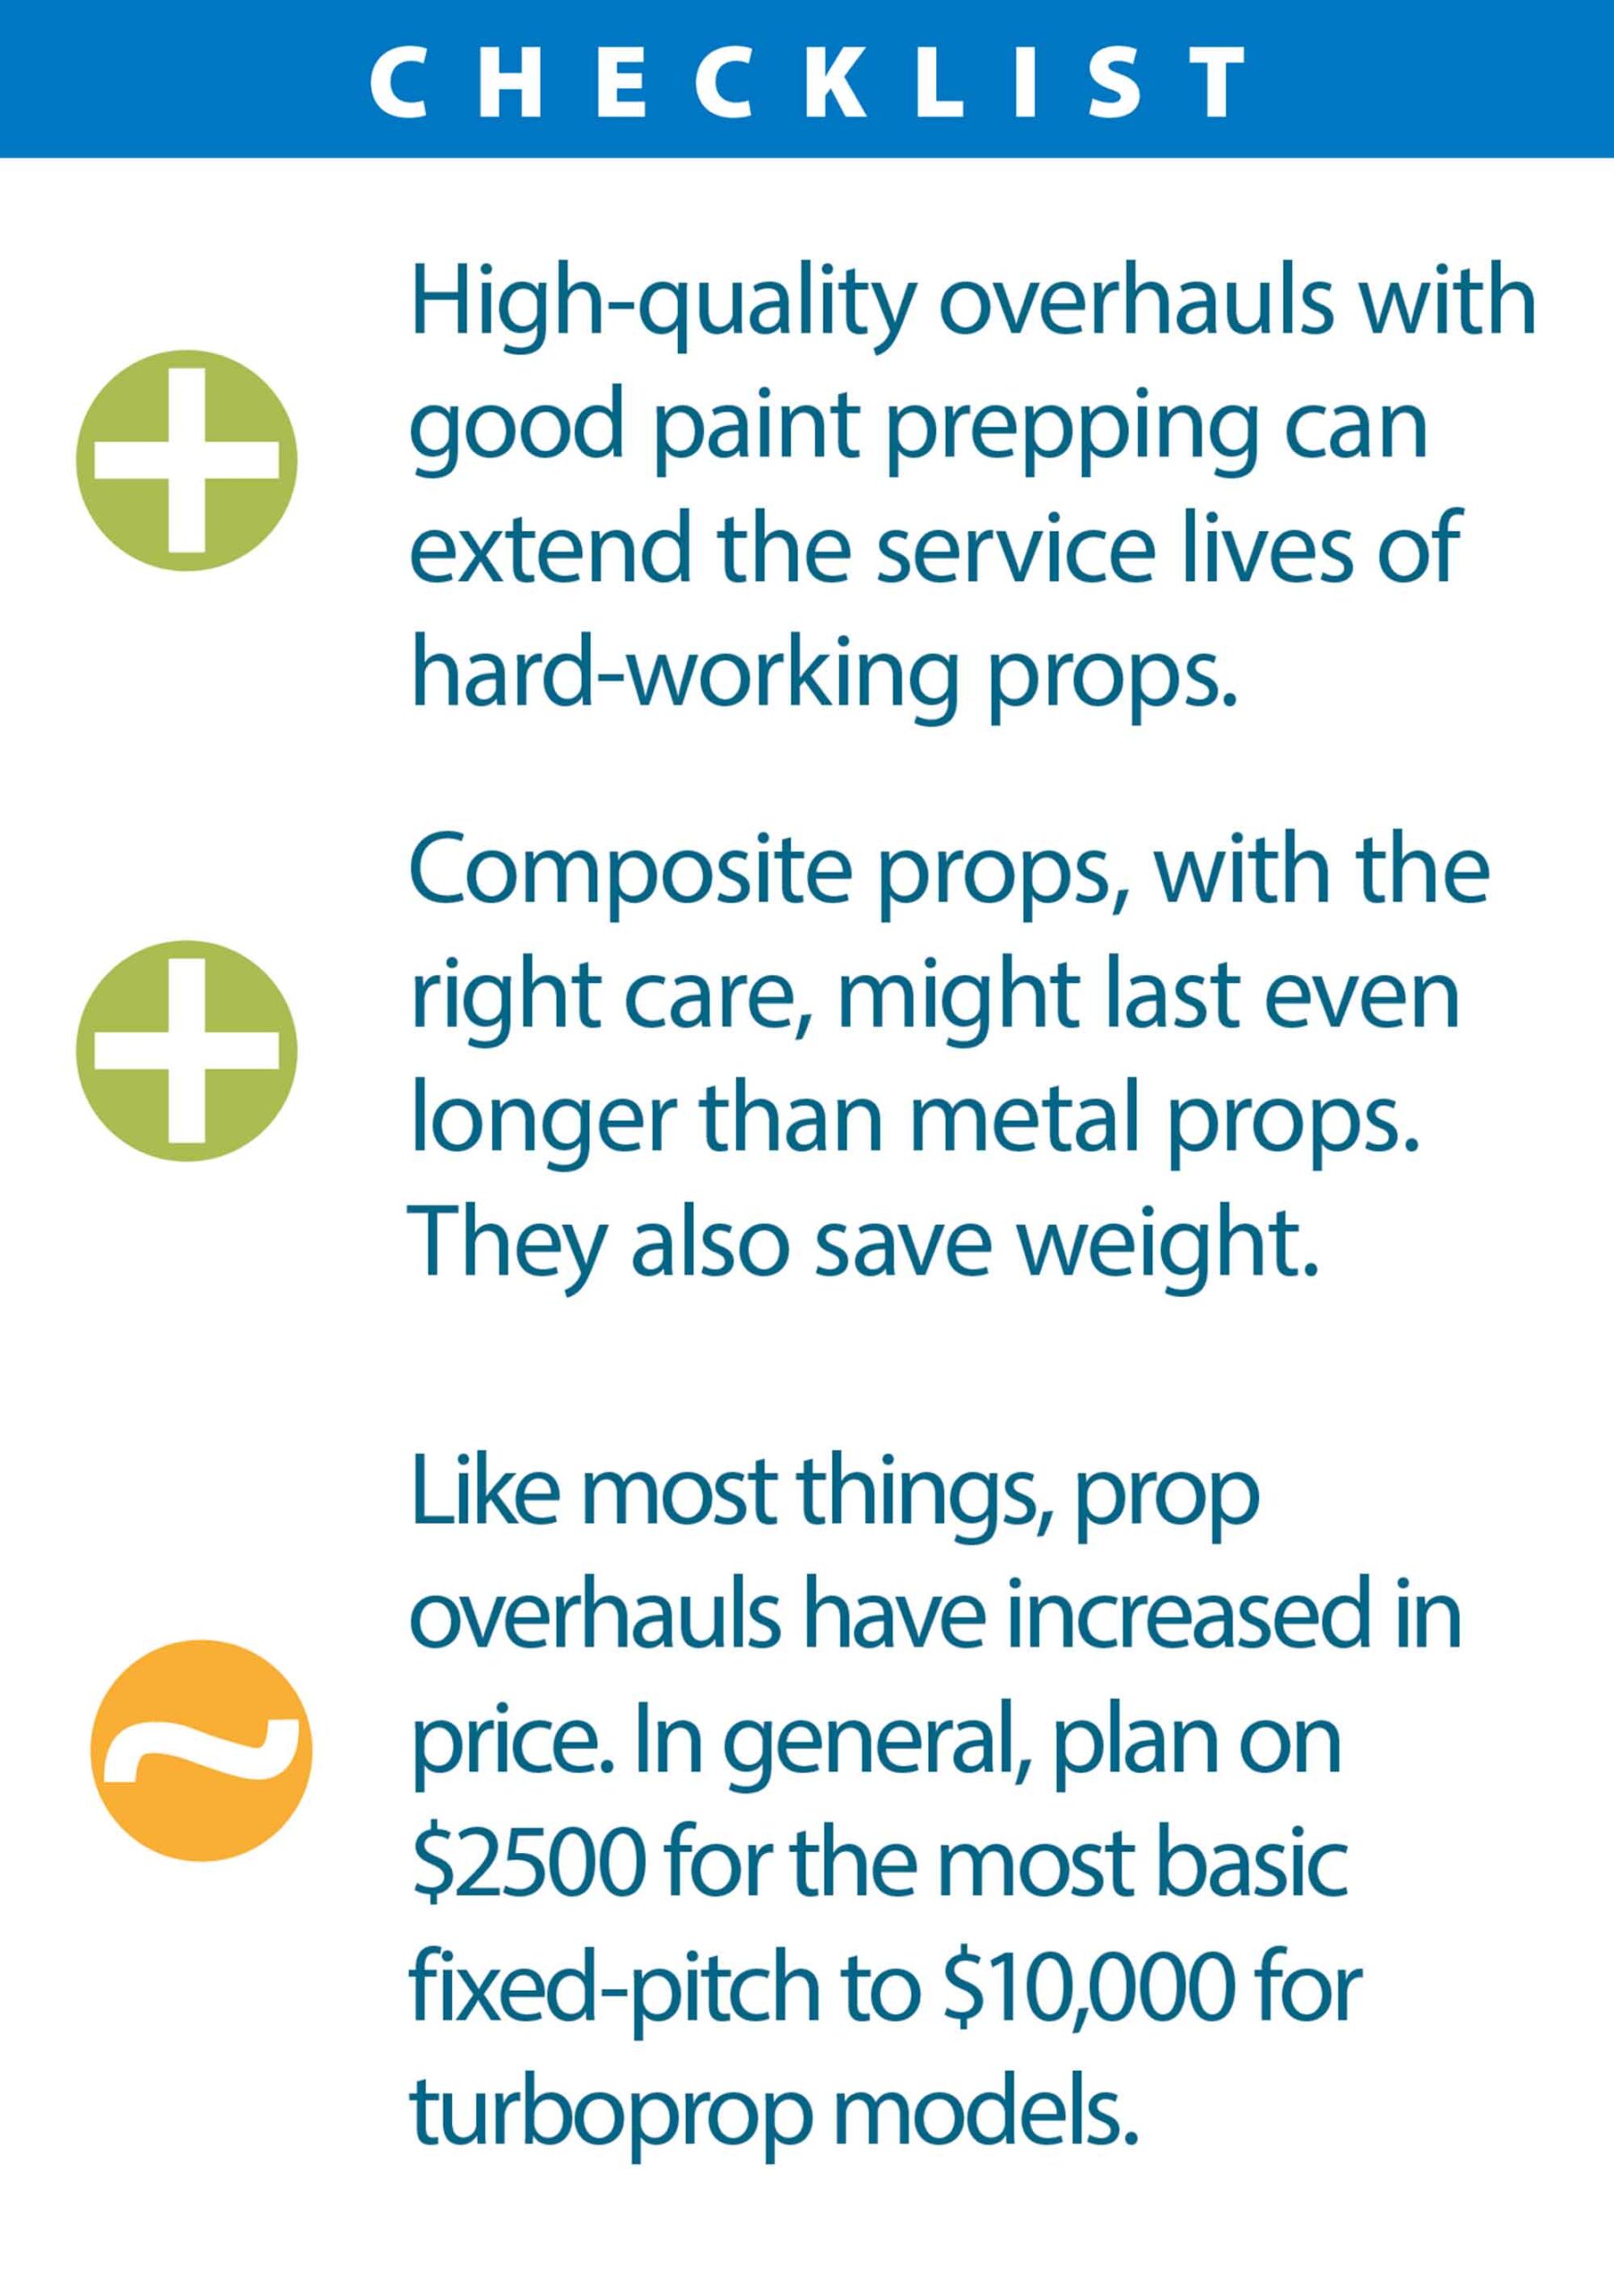
Propeller spinners are one of the most overlooked parts on the airplane because they’re generally trouble-free. It’s an accessory that is always there (although they can depart the airplane), subtly adding to the look of your aircraft and frankly, as something pointy out front where it pierces the air and helps the plane get the most speed, engine cooling and power. It’s simple to give it some love and attention. Keep it clean, inspect it for cracks at the prop holes and look for cracks and elongated holes at the mounting screws. The aircraft’s owner can and should remove the spinner and can inspect/replace the safety wire on the prop bolts, according to a couple of things in the FAA’s Approved Owner Maintenance List Part 43, Appendix A, Paragraph C.
Cracks are the most common damage, and usually these are at a screw hole or in the attachment bulkhead. A dented spinner may or not be repairable, and some dents might need to have the spinner annealed, hammered out or planished to reshape by a skilled a metal worker. A spinner left on an airplane for long periods of time could develop corrosion that appears as a rash under the paint. The paint will flake off and the corrosion presents as a white powder, which you should have further investigated by a mechanic. Let’s move on to propeller repairs and overhauls, starting with the governor.
Waiting to fail
The prop governor is nothing more than an externally mounted oil pump that selectively “leaks” oil pressure from anywhere between 50 to 280 PSI as needed to the prop hub. There, it’s converted to mechanical piston motion to effect prop blade pitch changes.
The governor is obviously the most complicated portion of constant-speed propellers. In reality, the most common general aviation constant-speed prop propeller is nothing more than a single-acting, spring-balanced hydraulic cylinder with piston actuating rod(s) attached to offset pins in the pivoting blade shanks. Oil pressure acts only one way in this design. A combination of centrifugal force and counterweights and/or springs acts to move the blades in the other direction when the oil pressure is reduced via the governor. This allows the blade angle to be selected depending on the amount of hydraulic pressure applied to the inside of the cylinder/piston assembly (sometimes called the prop dome). This pressure comes from the governor itself, which has its own internal oil pump to multiply nominal engine oil pressure up to 280 PSI, depending on the governor make and model.
Done right, a governor should be completely disassembled to inspect and clean the internal components. During nondestructive testing, techs are looking closely for signs of corrosion and pitting. Moreover, each manufacturer specifies a list of parts that must be replaced at every overhaul. This includes gaskets, seals and O-rings—usually included in an overhaul kit. There’s also the mandatory compliance of service bulletins and ADs. It’s not uncommon for shops to perform a magnaflux inspection on components that aren’t replaced, in order to spot hairline fatigue cracks and other flaws.
More than blade work
When we visited Sensenich Propeller Services, we saw a very structured process for both inspecting and preserving propeller components. An important part of the overhaul is nondestructive testing.
This is a detailed inspection for cracks, damage, corrosion and any imperfections in the metal. All aluminum parts are inspected, and steel parts are submerged in dye penetrant liquid, rinsed, heated to dry and then inspected under a black light for further signs of cracks or stress. Once the techs determine if a prop is structurally sound (many are not), they measure the various components’ specs, including putting a close eye and a micrometer to the prop’s piston rod to check the outside diameter for tolerance and damage. All measurements are recorded on the propeller’s work order. This paperwork is important and something you should keep with the aircraft’s maintenance records. Any component that’s found to be outside of tolerance or damaged is red-tagged and scrapped so it can never be returned to service. On a side note, we see some of these propeller components for sale on the used market and you should avoid them at any cost. Purchase any propeller part and it should have regulatory paperwork clearly stating its disposition.
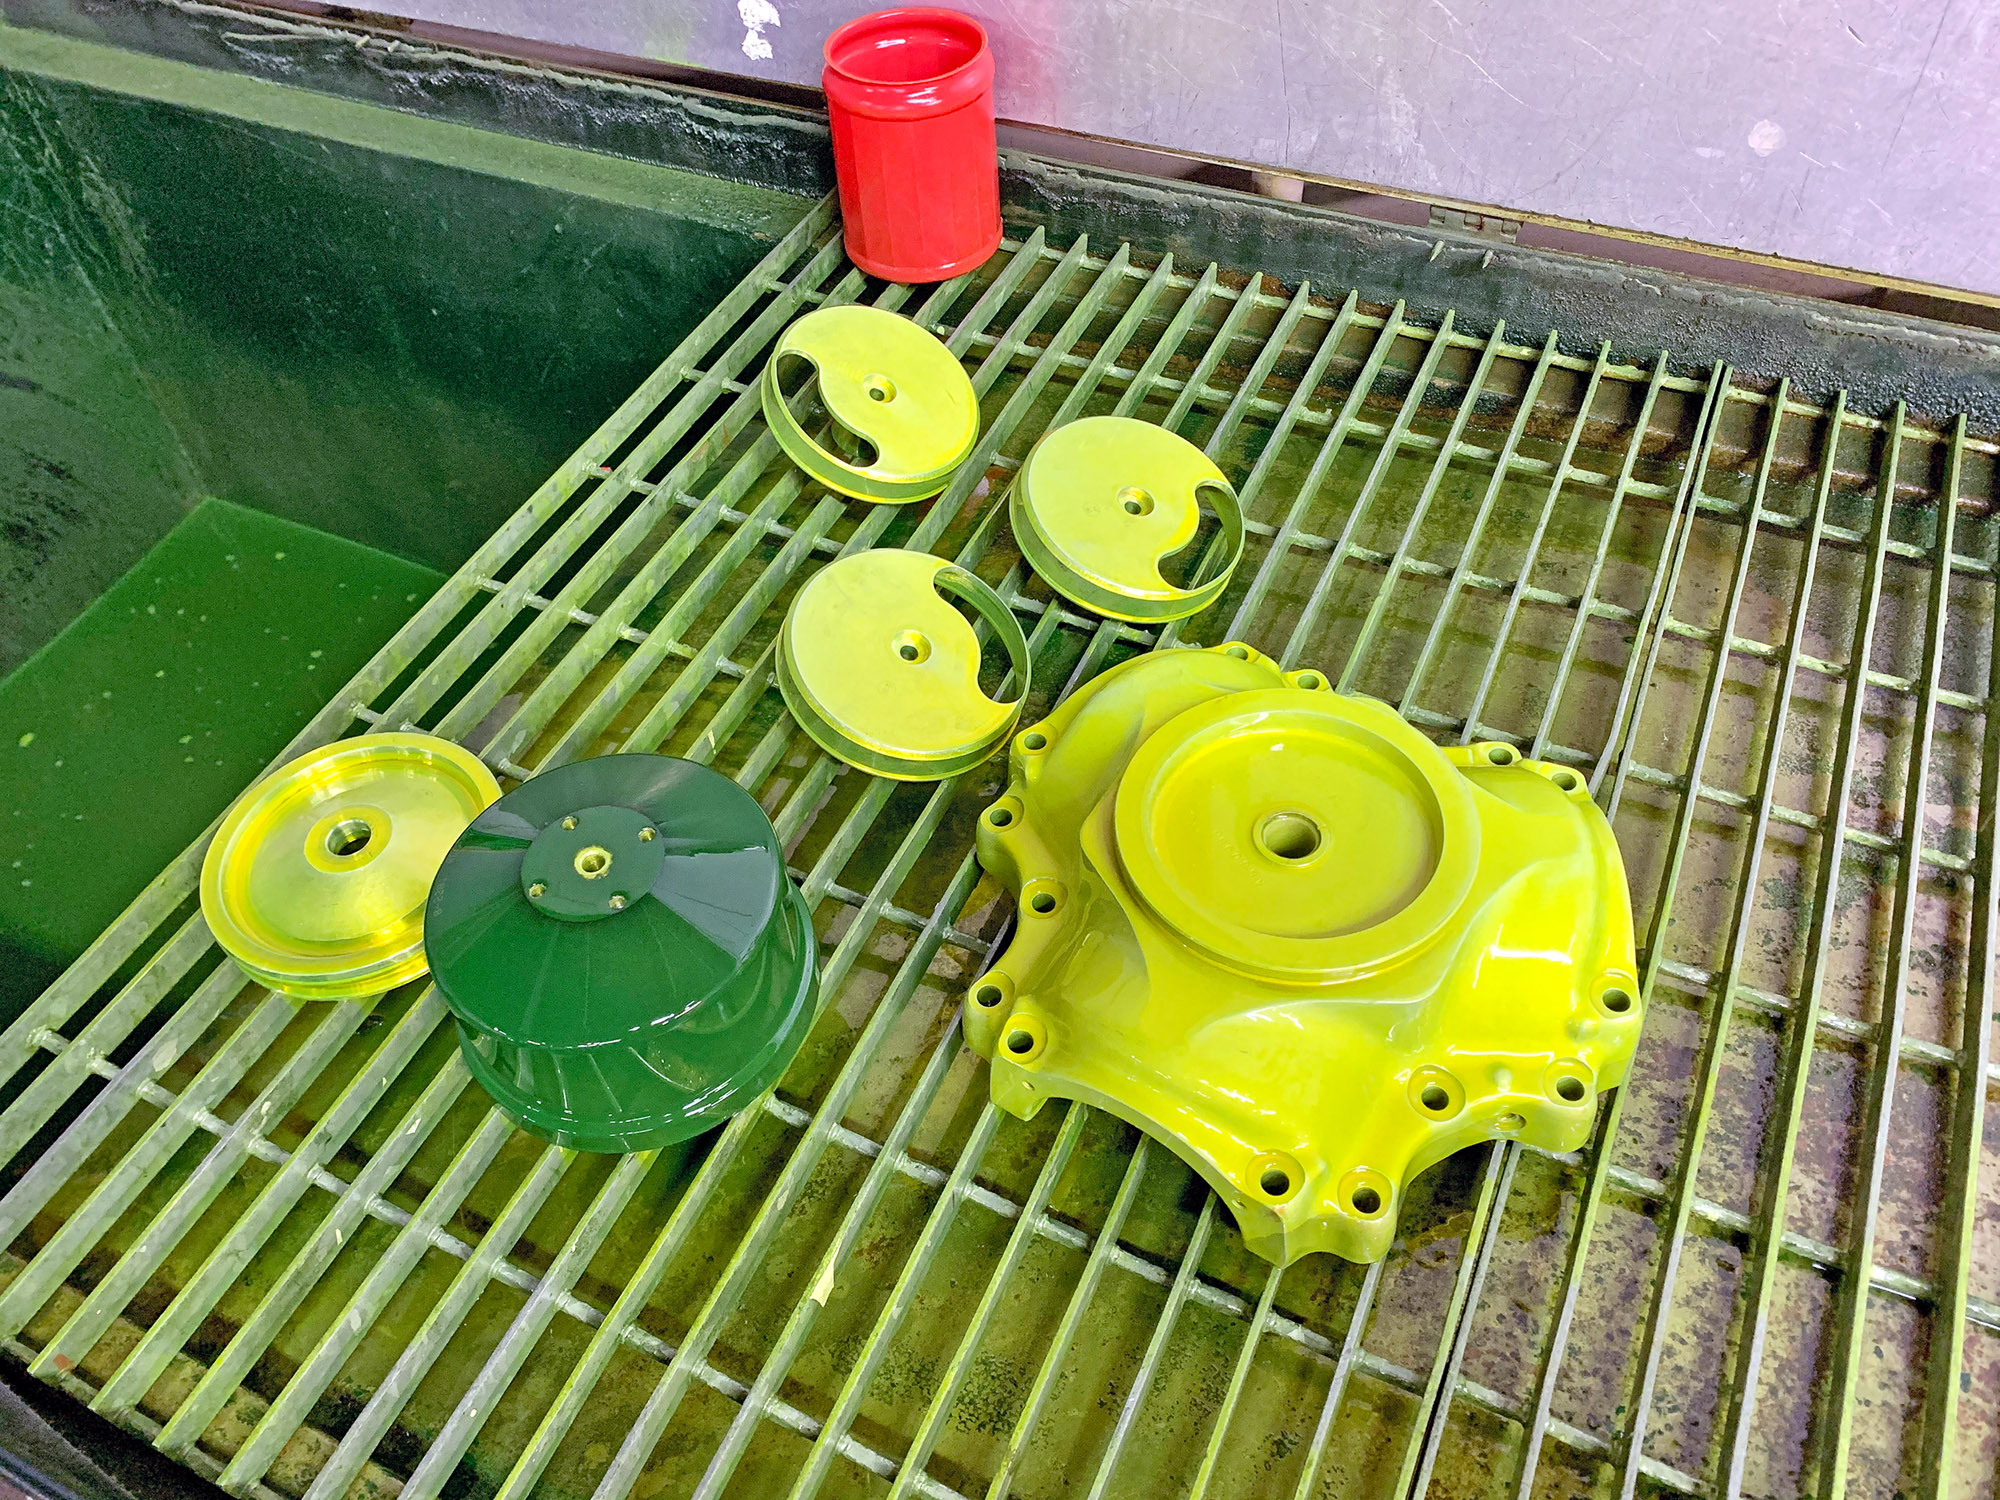
At the shop, in-tolerance steel components are sent for a plating process, which is a sacrificial nickel-cadmium metal coating in hopes of preserving it from corrosion until the next TBO. It’s common to find corrosion and wear on a prop’s bearing races. The bearing arrangement circumferentially surrounds and engages with a section of the prop blade. The outer race assembly has roller bearings and the inner assembly has angular contact bearings. These have reconditioning limits, of course.
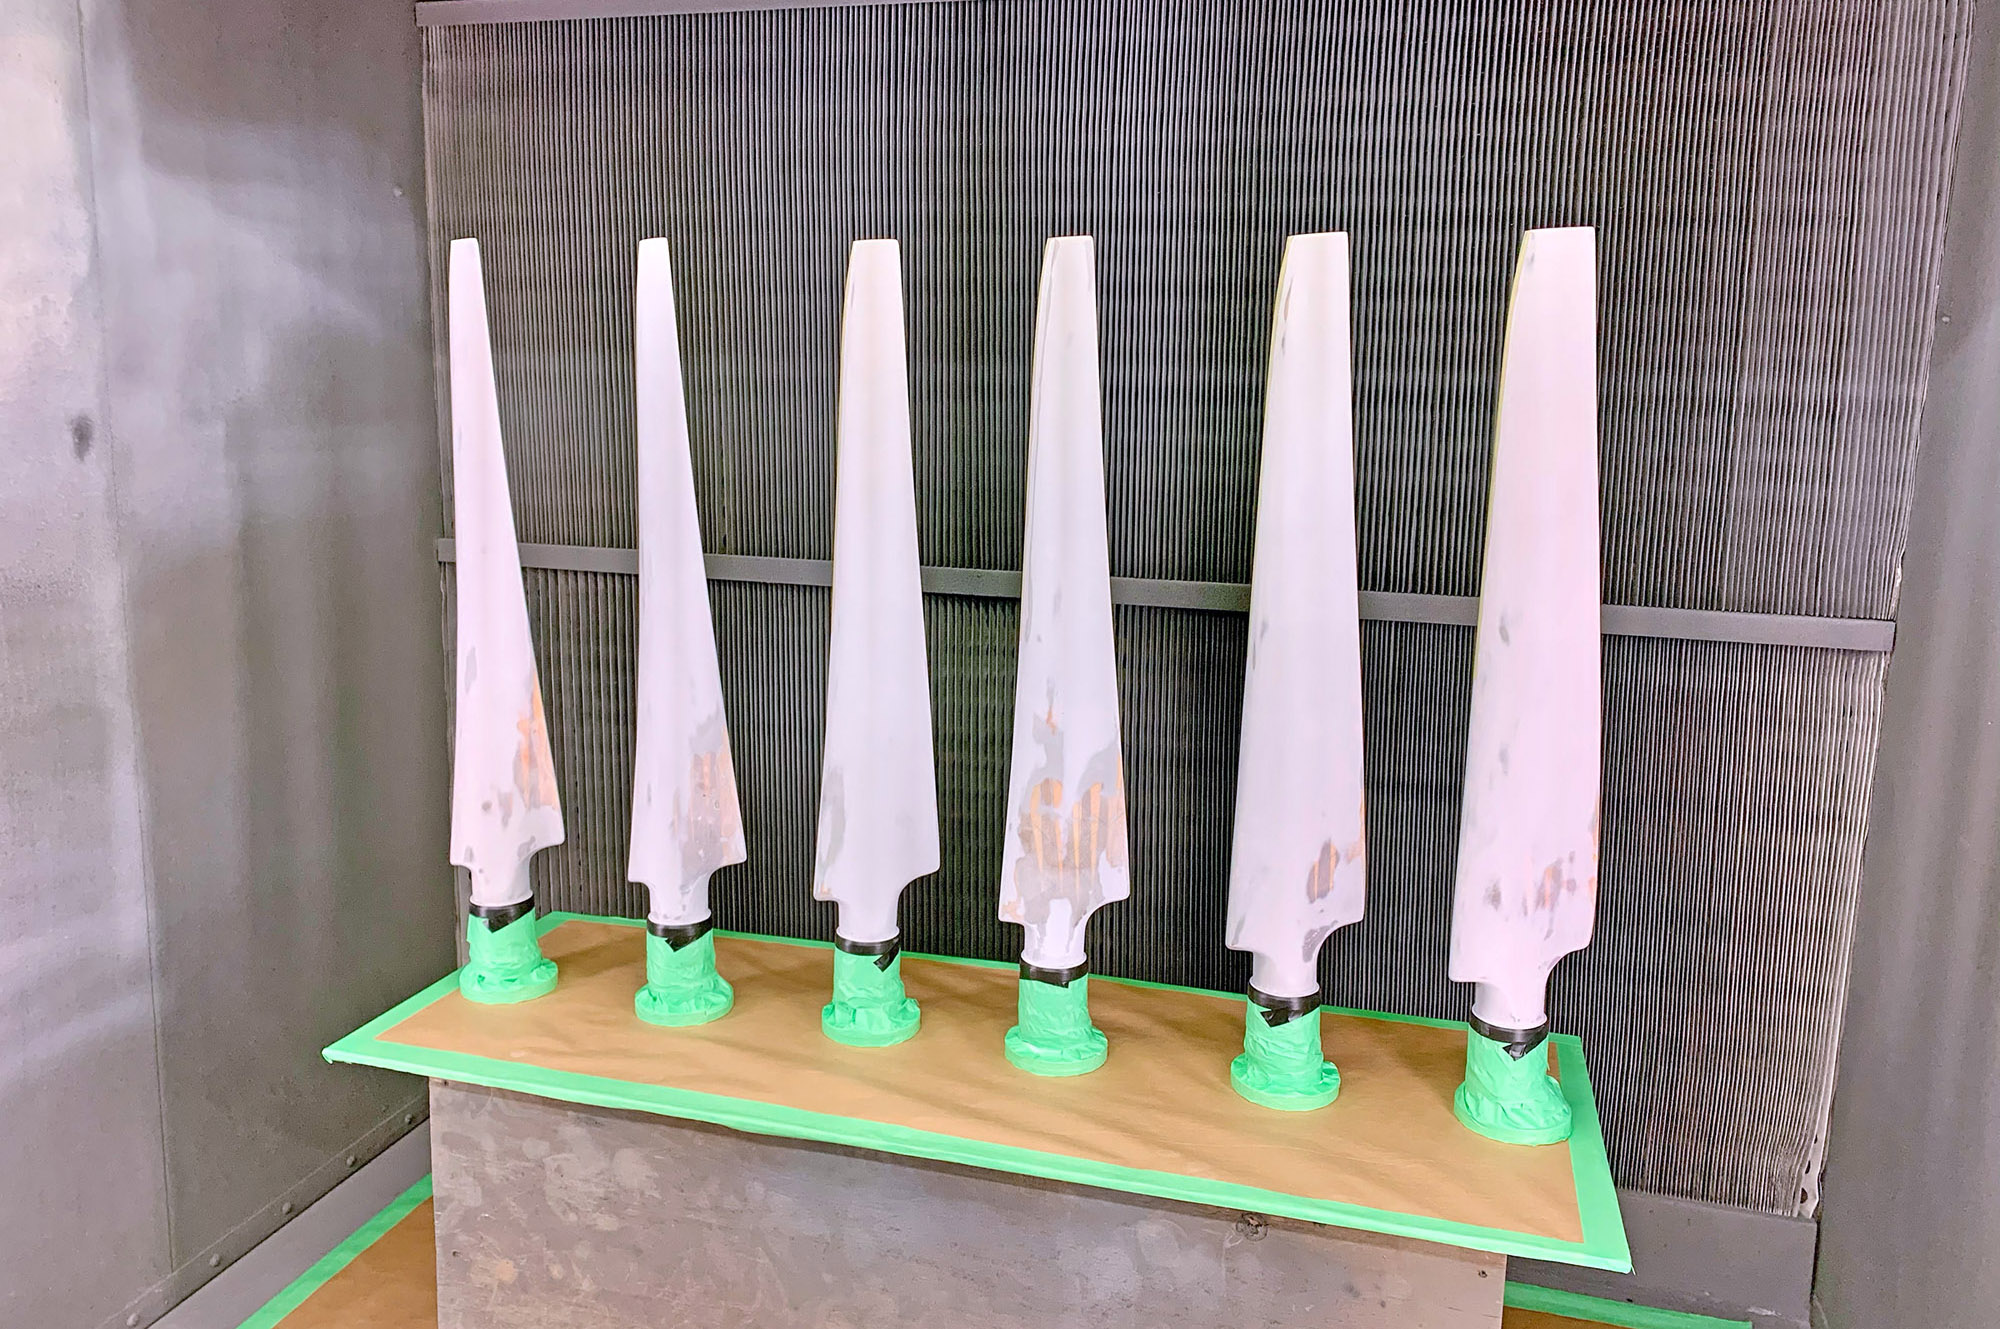
Reconditioning the blades is a relatively crude process, but it’s really an art because you have to ensure the airfoil remains clean, while maintaining the original shape of the blade and the prop’s tip. This is generally done by hand with a rotary sanding machine and then prepared for painting. But again, not all shops prep to the same standards. The preferred method is dipping them in Alodine, also known as chromate chem film. Alodining helps the paint adhere to the blade, while also protecting the blade against corrosion. Pick a color, though black and grey are the most common, and black is almost always used on the face of the blade (or the area that faces the pilots) to eliminate sun glare.
Buttoning ‘em up
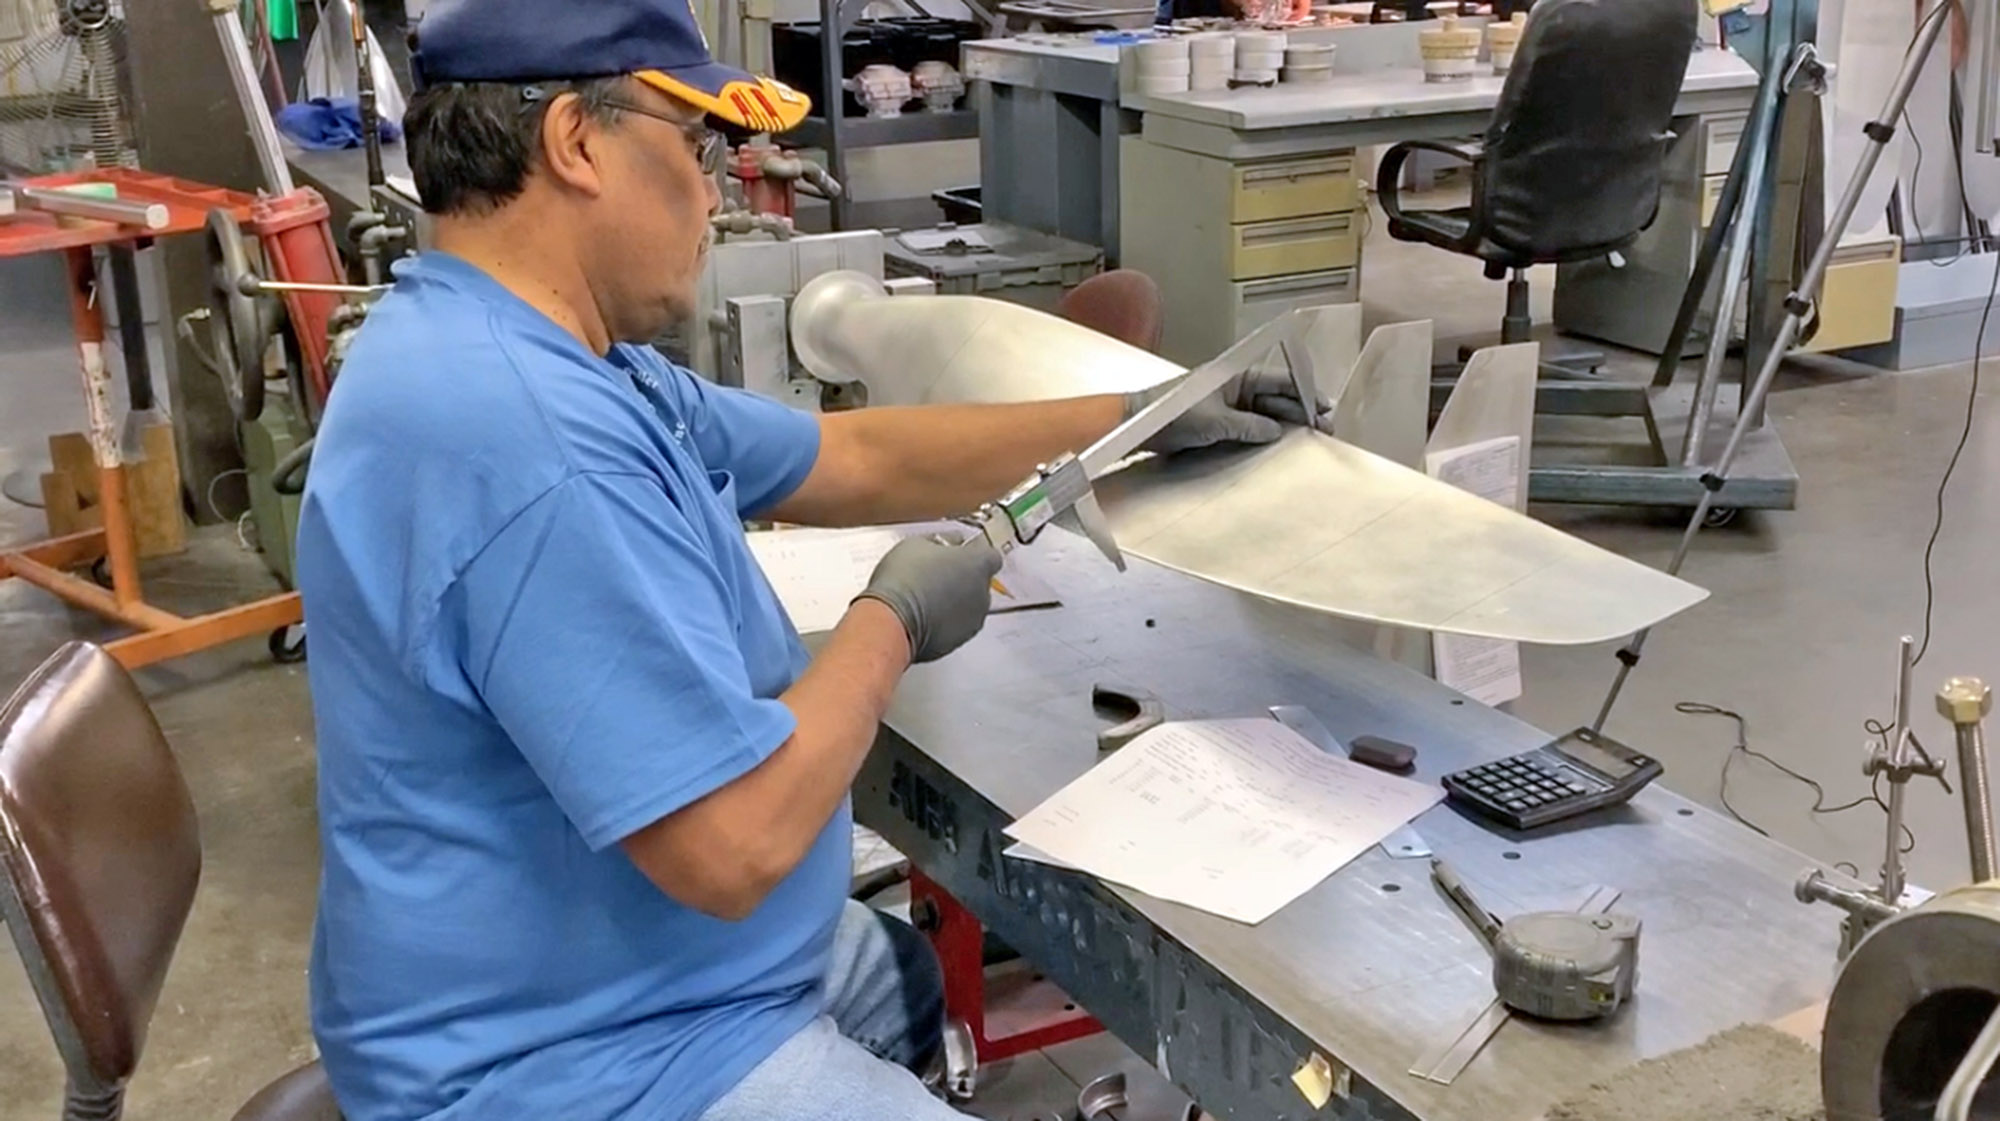
Once the components are overhauled, repaired or replaced, the final assembly is a critical stage in the process because this is where the blades are mated with the hub. Worth mentioning is that the overhaul process is where you might consider changing the pitch of the blades on a fixed-pitch propeller (pitch is measured in inches of forward movement per one rotation of the blade), if it’s approved on a given airframe. Shops generally use a twisting machine with two hydraulic cylinders that oppose each other.
Under pressure, one cylinder goes one way and the other the opposite, which causes the blade to bend. It’s a somewhat crude, tedious and precise process that starts with the tech marking a series of points (stations) on the blade, which are measured from the hub. Using a digital protractor the tech measures the angles at every station of the blade’s face, comparing them with the specs from the original build. You can only alter (or bend) the fixed-pitch blade a certain amount—a couple of inches in either direction.
During the final assembly, the blade angles are set, deicing accessories are installed and the prop is made ready for static balancing. All the hardware is properly torqued and safety wired per manufacturer’s specs. A few words on dynamic balancing are in order.
A few shops we talked with strongly suggested having the propeller dynamically balanced on the airplane, which essentially marries the overhauled prop with the aircraft’s engine. The RPX DynaVibe balancing system, which uses a handheld analyzer and accelerometer sensors that are attached to the engine to measure vibrational movement of the prop and the engine, is a highly regarded tool. Most shops also use a tachometer to measure the engine RPM during testing.
Re-pitching is generally an added expense. Depending on the workload of the shop and the complexity of the propeller, downtime could range from a couple of weeks to a month or more. Prices might be all over the board, but a typical constant-speed prop overhaul might run around $5000, while more basic props can cost roughly $2500. Don’t underestimate the cost of freight. Propellers are either hand-delivered or shipped in large wooden crates. Don’t skimp on insurance or packing. We’ve heard horror stories of propellers getting damaged in shipping, making the total overhaul process far more expensive than it should have been.
Composite props
Forget everything you know about metal propellers. Composite props—which have gained huge popularity over the past several years—save weight (as much as 20 pounds) and reduce vibration. They’re also more expensive, but might last longer than metal props. A composite prop has blades made at least partially of layers of epoxy Fiberglas, Kevlar or carbon fiber. The composite material is on top of a core that is either hollow (rare) or made of wood or foam. The ferrule (base) of a constant-speed prop is generally steel or aluminum and fits into a hub that is largely identical to a prop with aluminum blades. A fixed-pitch composite prop often has no metal at all.
Moreover, because composite blades are never filed down in the process of repairing damage, as are metal blades, composite prop blade life is essentially infinite. Still, the overhaul of a composite prop is similar to that of a constant-speed metal prop. The process starts much like it does with a metal propeller, with disassembly for a thorough damage inspection. A dye penetrant inspection will be accomplished on the hub, making sure it’s within specs. As for the composite blades, if there are dents and dings on the leading edges, the shop generally replaces them as needed.
What they’re doing is taking off a few upper layers of glass making sure there’s no signs of delamination and cracking and then rebuilding those layers back up to the original dimensions. Composite blades are first coated with spray fill to fill in small voids, pinholes and any imperfections in the composite surface of the blade. And of course, there’s a final painting/finishing process that’s gotten better in recent years.
As one example, MT changed its paint a few years ago to the Sherwin Williams Aerospace Coating product, fixing early problems where some composite blades would shed the finish when flying in rain, especially in turbine applications.
We’ll look specifically at composite propeller repairs in a separate owner satisfaction survey report in an upcoming issue of Aviation Consumer.