
There are all sorts of reasons for replacing tires that still hold air. Tread gets worn out, they might start to bulge in some places and they might be severely flat-spotted. Eventually, every aircraft owner will be faced with tire swaps.
There’s no reason why you can’t tackle the job yourself because it’s one of those DIY maintenance items that the owner of the aircraft can complete and sign off. But there is some critical disassembly and reassembly required. Here’s a primer to get you started.
Get the manual
Like all DIY tasks, start with the proper documentation for your particular aircraft. It’s not just about pulling the rubber off the rim. Stuff like tire size, ply and pressure, wheel through-bolt torque, brake caliper bolt torque and fairing disassembly (if you’ve got fairings that need to be disassembled) are all considerations. Reference the parts manual for the exploded-view drawing of the wheel assembly—it’s a handy guide for disassembly. Of course you’ll need to jack up the aircraft to get the tire off and we’ve seen this go off the rails. Use caution.
Find a level spot—preferably in an uncluttered hangar. Use the tire change as an opportunity to inspect other items, including the brakes. Brake disassembly can be really simple (Clevelands come to mind) or difficult. With many systems, undoing the caliper bolts is as easy as putting a 7/16-inch socket to them and slipping the assembly apart. Since you’ve got the thing in your hands, you may as well take a minute to look at it. Are the pads worn? Any signs of hydraulic fluid leakage? It might also be a good idea to give your brake and its associated components a quick cleaning.
With the brake caliper off, gently swing it out of the way of the wheel. A handy trick is to hang the caliper on the landing gear strut with a loop of safety wire to keep it out of the way. Be careful, though, that you don’t kink or twist the brake line or let the caliper dangle from the brake line without support. You’re still not ready to jack the airplane—there’s the simple matter of the wheel-nut cotter pin to deal with. This is best done with the wheel still on the floor, since some twisting, prying and pulling are bound to be involved.
An easy way to get the cotter pins out is to straighten the bent ends back together as much as possible, then use a pair of wire cutters on the eye end of the cotter pin to pry the pin up and out of the axle and nut. Once it’s out, send it to the rubbish bin and get a new one.
All jacked up
Real wing jacks can make aircraft acking much safer, and especially if you’re doing more than one tire they can make the job go faster and easier. But we understand not everyone has a full set of wing jacks (they are pretty pricey for the average do-it-yourselfer), plus if you’re only doing one main tire, it’s easier and a little more convenient to just use a floor (scissors or hydraulic) jack. But it’s not the most stable way to do it. Lobby the help of a mechanic to show you how and where to place the jack’s lift pad. Some aircraft have special axle inserts to make using a floor jack easier. Again, reference the maintenance manual, and whatever you do, put a block underneath the axle as a layer of safety.
Once the wheel is off the floor (about half an inch or an inch worth of altitude will do), use a large adjustable wrench to loosen the axle nut. Spin the nut off and make a note of the positions of any spacers that might be lurking on either side of the wheel. Then slide the wheel off the axle, lay it aside and get those wood blocks into position under the axle. Your stack of blocks should come up as close as you can get them to the axle so that if the jack collapses or the gear leg slips off the jack, the axle will land on the blocks. Some mechanics who routinely use floor jacks for tire changing and bearing work make it a habit to lower the axle onto the blocks as soon as the wheel is off nd the blocks are positioned. This way, the axle is already resting on the blocks and the airplane is on a stable platform. We can’t stress enough the importance of proper jacking, and a failsafe. We’ve seen them gone bad and it isn’t pretty.
Time to split
But not after deflating the tire. Bring the wheel over to a workbench or some other convenient and stable platform and mark the wheel halves so you can line them up with each other during reassembly later on. Worth mentioning is that the wheel halves should go back together with the same orientation relative to each other to prevent changing the balance of the wheel hub assembly.
With the wheel halves marked, break out your tire tool and screw the valve core out of the tire valve stem. Keep your fingers around the end of the stem as you unscrew the core to prevent it popping out on the last thread and catapulting across the hangar. Unscrewing the valve core is the quick way to deflate a tire, plus it makes the tube much easier to handle later on.
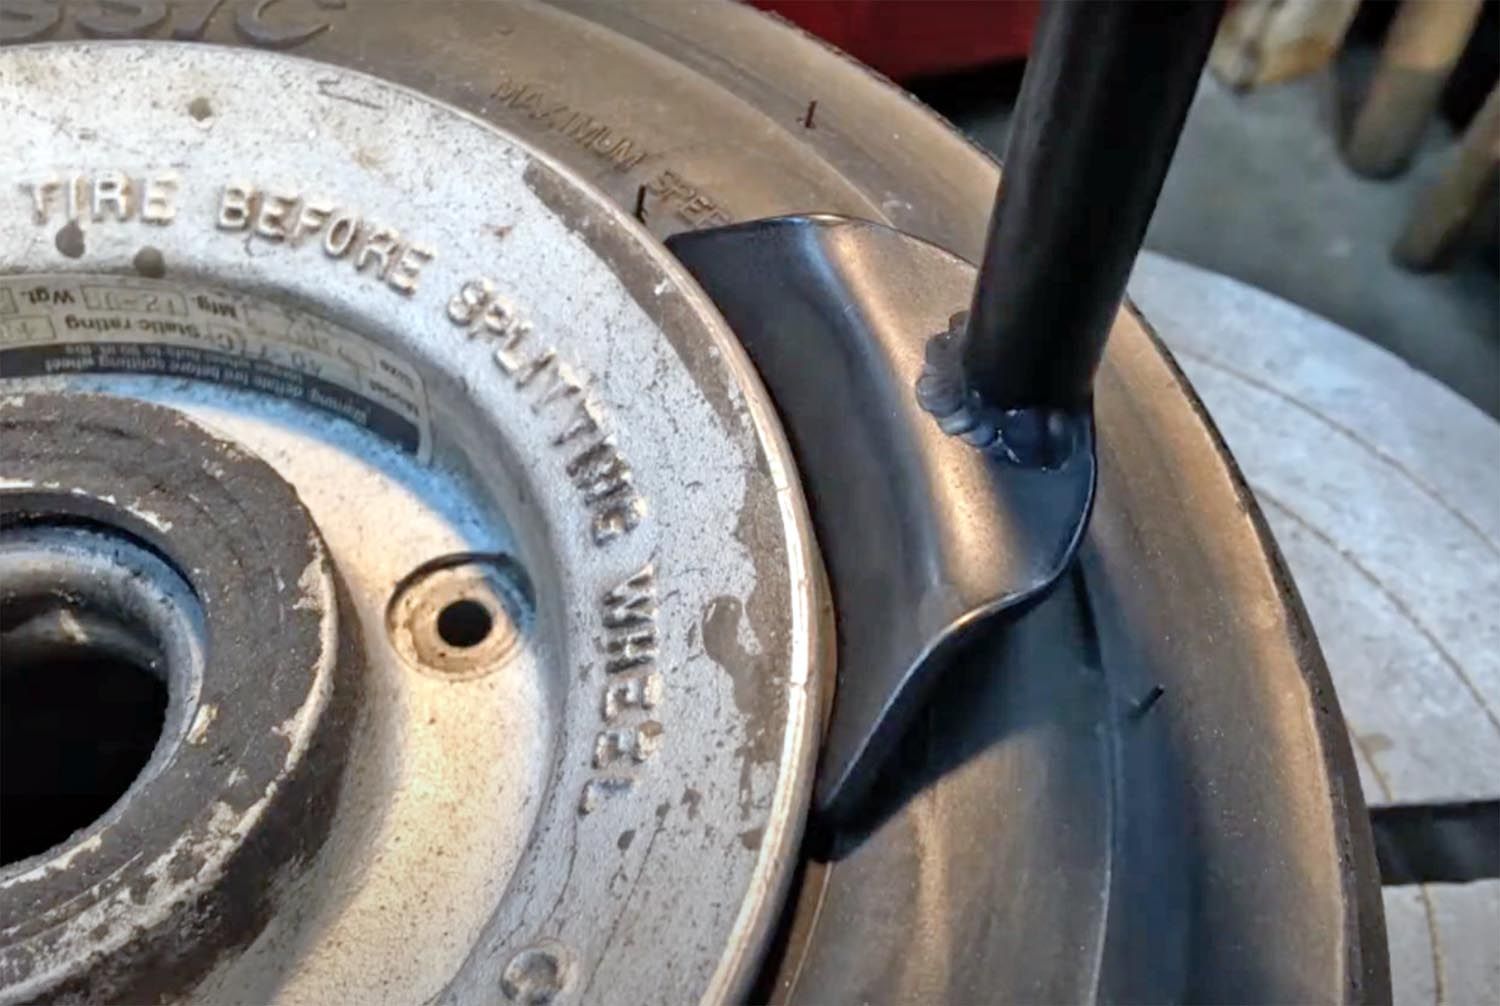
Once the tire is deflated, it’s time to break the bead. Pros use a bead-breaking tool—which is a snap. With one of these, you just put the end of the bead breaker on the tire at the edge of the flange and push the arm down. Work your way around the tire until you see the edge of the tire sag away from the rim. Then, turn the wheel over and do the same on the other side.
If you don’t have a bead breaker, you can break the bead on most small aircraft tires by jumping up and down on the tire. Use both feet (one on each side of the wheel) and work your way around, being careful not to scratch the rim on the ground. It’s not a great method, nor is it recommended—but in a pinch it will do. We certainly prefer a bead breaker. Whatever you do, leave the screwdriver and pry bar in the toolbox. This will mar the wheel halves and set the stage for later wheel-half cracking and eventual failure.
Once the bead is broken, undo the wheel-half bolts. Note the direction the bolts are facing (i.e., bolt head on the outboard side of the wheel) and the order of the hardware. With the bolts removed, it should be fairly easy to remove the wheel halves from the tire.
Once the assembly is apart, take the time to clean and inspect the wheel halves. Pay special attention to the wheel flanges, examining them for cracks, dents, gouges, etc. Look at the through-bolt holes—are they elongated? Some defects you find may be repairable, others not. When in doubt, stop right there and get a qualified mechanic to backstop it.
Keep an eye out for grease. There’s only one place that should be greasy—the bearings. Everything else should be clean. Even in the bearings, there should only be grease inside the bearings—not on the inside of the inner cup where it rides on the axle. Some people think that having grease in the cup is good, but it may defeat the function of the bearing since the bearing is supposed to spin on itself, not on the axle. With the wheel halves cleaned and inspected, set them aside along with the hardware.
Inspect the tube
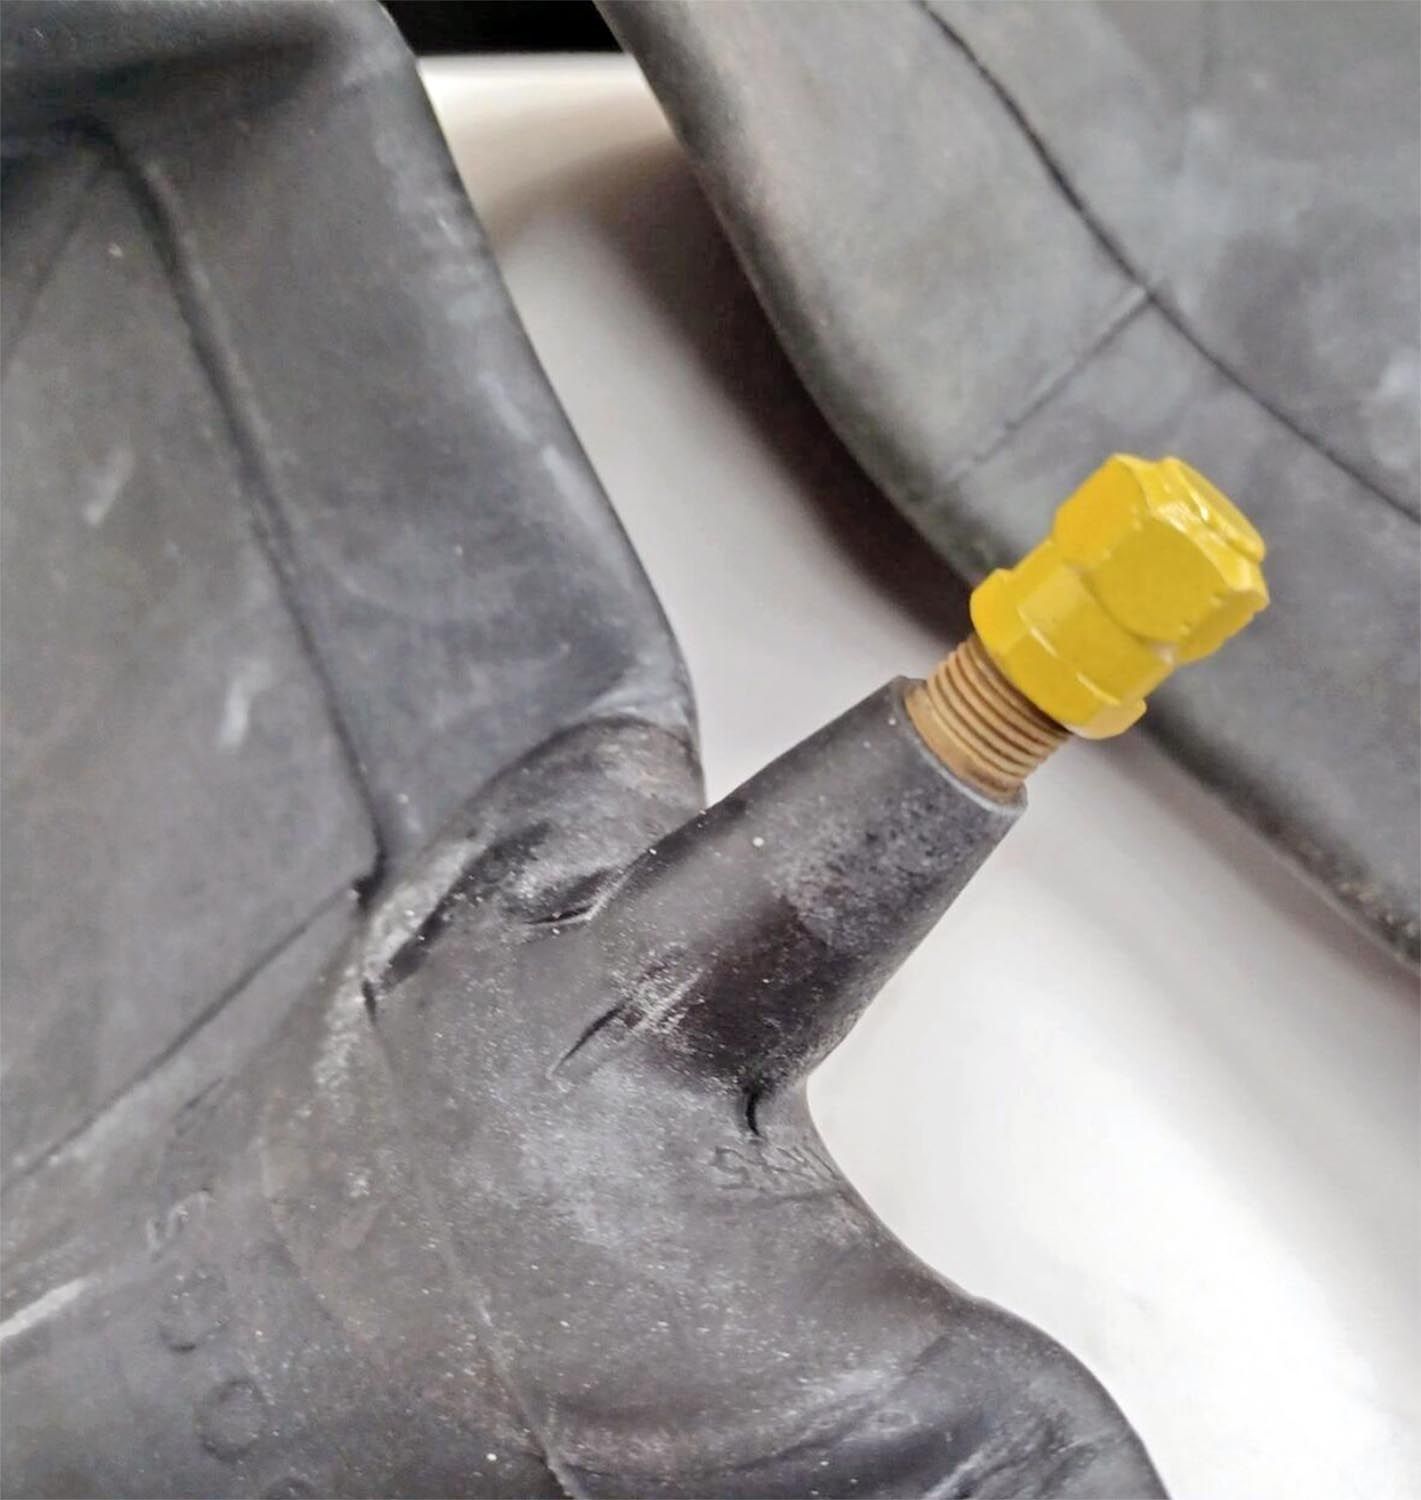
With the tire naked from the wheel, slip the inner tube out of the tire carcass and lay it out flat on the bench. Inspect it carefully, noting any creases or chafing marks, which could happen if it didn’t seat properly after the previous installation. Are there any signs of damage around the valve stem?
Inner tubes are sort of controversial, and some believe they should be shotgunned at every tire change. Can they be repaired? The answer is yes. It’s not uncommon to find reinforcement patches on the inside and a standard patch on the outside. Even faulty valve stems can be repaired and we’ve heard from mechanics who source repairs from local automotive tire service centers.
Still, even though a tube is repairable, should you replace it? What if it isn’t damaged, but you want peace of mind? Inner tubes can cost as much as $400. There have been technical bulletins over the years (McCreary is one) that say inner tubes shouldn’t be reused because they have a memory, which means once they are inflated they never come back to their original dimensions—which is larger. That could result in a fold during reinstallation and possible chafing that leads to ultimate failure.
But the truth is, most mechanics do a good inspection of the inner tube and simply reuse it. One extra step is the bubble test. Add a bit of air, stick it in a big sink or tub of water and look for air bubbles. If you’re convinced the inner tube is good to go, it’s time to put it all back together.
Reinstallation
Don’t get hasty—make sure the new tire is the correct size and ply rating. It’s easy to get the size right since you simply read the size from the old tire’s sidewall (or from the aircraft’s maintenance manual) and just order an identical replacement tire. When it comes to ply rating, some amateurs fall into the bigger-is-better trap, reasoning that if a three-ply tire is good, then a six-ply tire must be twice as good.
Let’s assume your original tire was a three-ply 6.00X6. The three additional plies of a six-ply 6.00X6 have to go somewhere, and that somewhere is on the inside of the tire (since the outside dimensions must be the same). Thus, the inside dimensions of the six-ply tire wind up being smaller than the three-ply tire. If you try to jam your old, already slightly oversized inner tube into that small space, it just won’t fit. It’s going to be folded or get pinched between the wheel halves. The only way to get more plies under your aircraft s to install the highest ply-rating assembly (as a whole) that’s allowed by the aircraft’s maintenance manual.
Reassembly of the wheel is fairly easy. Sprinkle some tire talc (baby powder is not recommended) inside the tire. Put in enough to completely coat the inside, and spread it around. The talc acts as a lubricant to help the tube expand and seat properly. With the inner tube completely deflated, find the locating mark on it. This is usually a yellow dot or stripe, and the locating mark will have to be aligned with the locating mark on the tire to help keep the whole thing in balance. Some tubes don’t have a locating mark, in which case you should line up the valve stem with the tire’s locating mark.
With the inner tube inserted in the tire and laid out as smoothly as possible, insert the wheel half with the valve stem opening and slip the stem through the hole. Flip the whole thing over and put the other wheel half in place (remember to line it up with the marks you made).
Pushing down on this wheel half, you should be able to hear metal-to-metal contact all the way around the rim, indicating the two wheel halves are in contact and the inner tube isn’t being pinched between them.
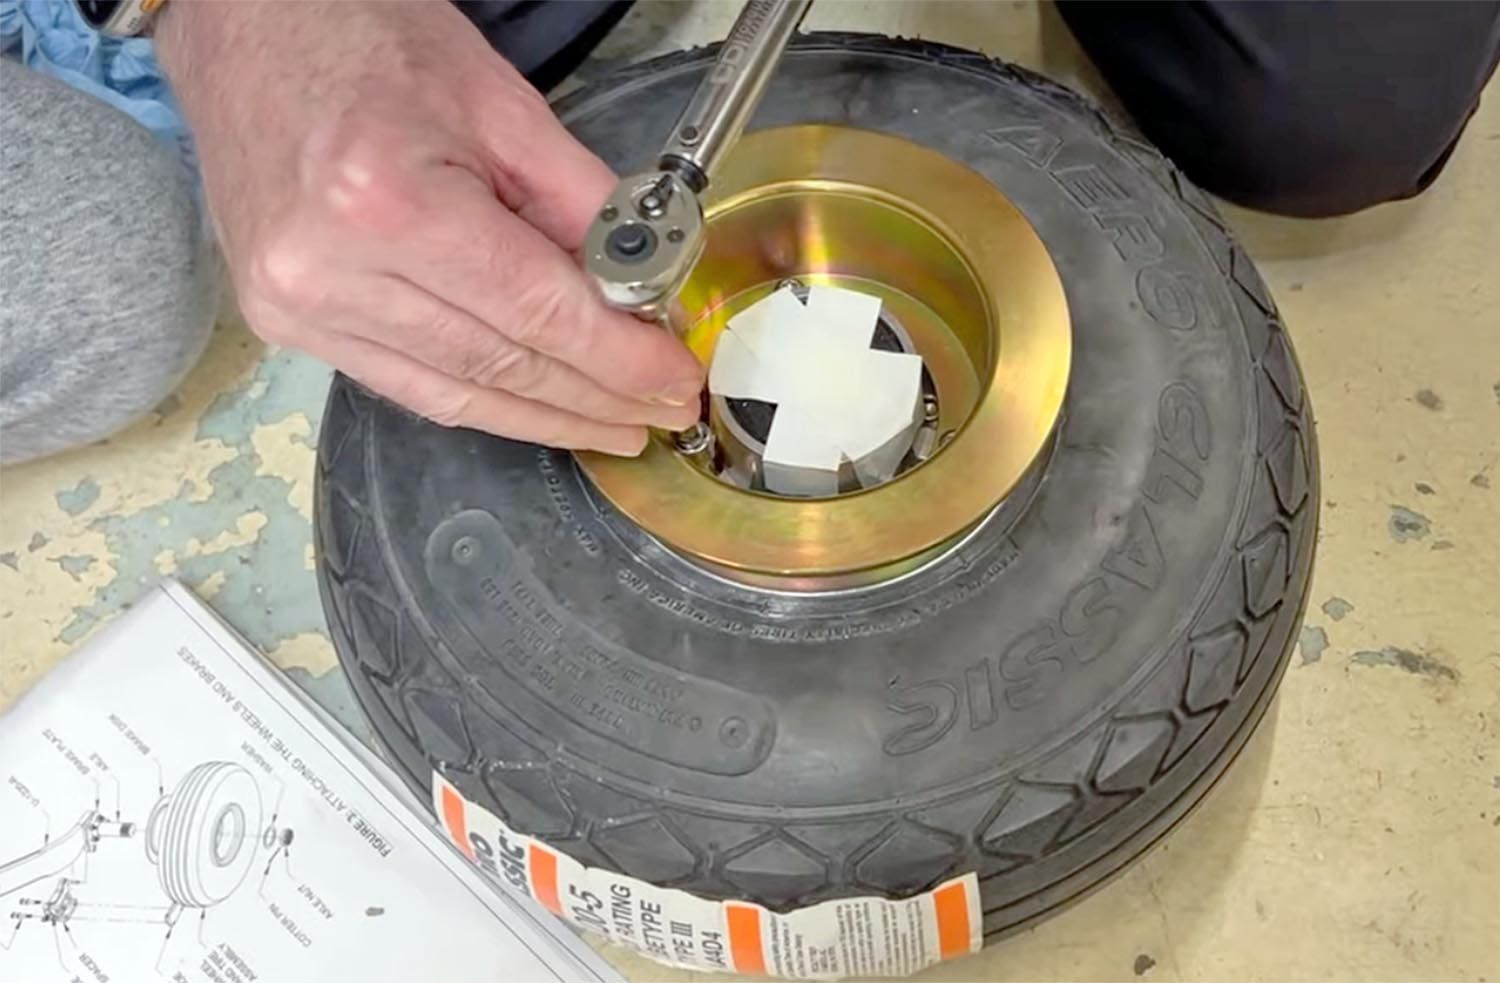
If the inner tube is clear of the wheel halves, slip the through bolts through and lightly tighten them down just enough to hold the halves together. Then, using a cross pattern, tighten the bolts to their specified torque. Often, that torque value is printed on a decal on the side of the wheel, but it’s also in the service manual.
With the wheel assembled, seat the inner tube and the tire bead by inflating the tire to its rated pressure, and then deflate it again. Then, inflate it again. This inflate/deflate procedure not only seats the inner tube and tire bead, it also prevents the inner tube from folding onto itself. Once it’s inflated, inspect the bead area for proper seating. If it hasn’t, deflate/inflate it again.
Button it up
Putting the wheel back on the aircraft s pretty much the reverse of the removal operation. There are just a few additional steps worth doing. Put a light film of oil on the axles, axle nut and any spacers not really for lubrication, but as a corrosion preventive. Slip the wheel back onto the axle and spin the axle nut on. Tighten it down until the wheel doesn’t quite spin free, and then back the nut off to get the cotter pin hole lined up with a castellation in the nut. Insert the cotter pin and bend it according to AC 43-13-1B. Before reinstalling the brakes, put some anti-seize compound on the slide pins and the threaded portions of the bolts.
After the brake has been reinstalled, give the wheel a spin. It should still turn easily with only slight drag. Use caution letting the plane down from the jack. Last, check the tire pressure again after 24 hours because the new tire will stretch. Make the logbook entry and if there’s any doubt about your work, have your mechanic give it a look before you fly it. Another set of qualified eyes won’t hurt.


