Paranoid about a potential $160,000 slide, and wondering why the airplane doesn’t make book speeds in cruise, a new light twin owner recently asked if there were focused inspections he can do outside of annual maintenance to spot landing gear troubles. And, a Cessna owner asked if he can calibrate his own magnetic compass. First some basic landing gear inspection tips.
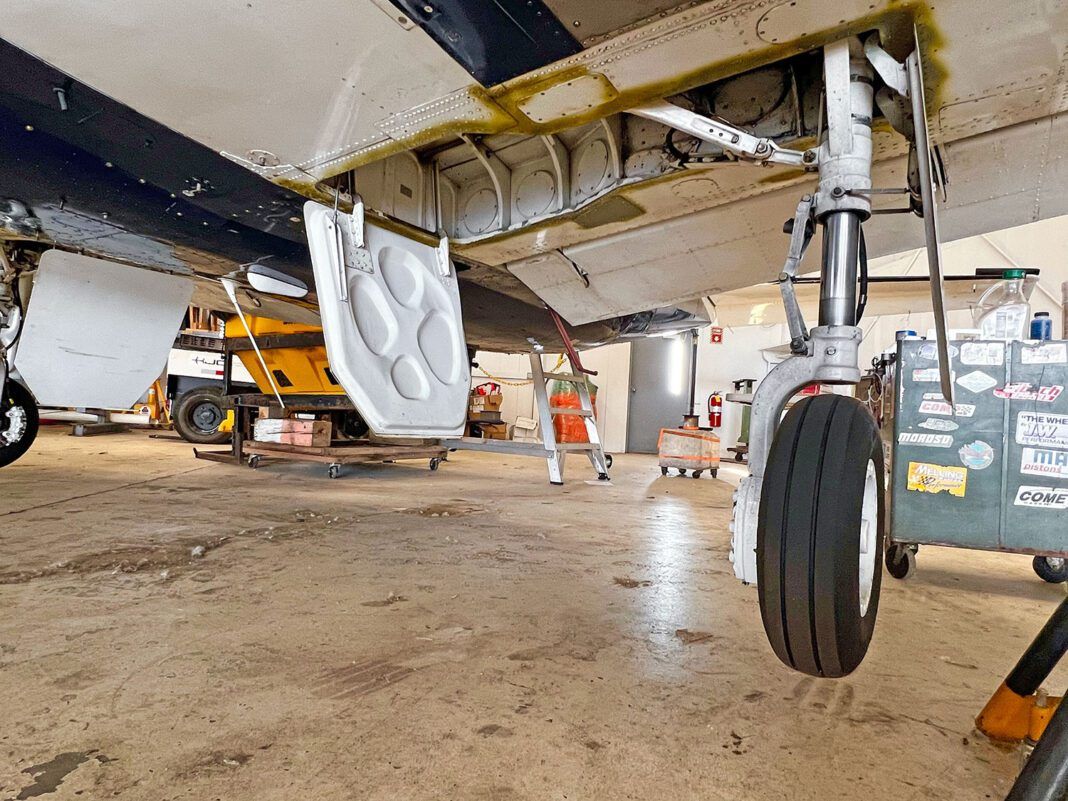
We’ve said it before—it’s worth spending the shop labor to have your mechanic demonstrate a gear swing. Since landing gear systems vary widely by aircraft, you’ll learn a lot observing a gear retraction and extension with the aircraft on jacks. At the same time, read the service manual, making note of the hardware. We don’t think pilots pay enough attention to gear doors, which can offer some hints of the gear’s general health, especially clamshell doors often found on the nosegear.
During preflight, inspect the edges of the doors for scrape marks, which often point to mis-rigged (out of alignment), chafing or rubbing as indicated by bare metal (possible loose doors), crimped or crinkled door edges and whether the door as a whole seems true and fair. Try giving it a little wiggle to check for excess slop or looseness. It’s worth keeping them rigged because they can rob speed and affect handling.
You also want to look for hydraulic leakage. Double-acting actuators, which are fairly common in hydraulic landing gear systems, have three possible leak points: the actuating rod and the two hydraulic lines attached to the cylinder. Run a finger around each line attach point and see what comes back. Also, make sure the rod is clean and not covered with grit or dirt, which may lead to later leaks. And while you’ve got your head up there, take a look at the hydraulic lines and fittings. Flexible lines should not be twisted or kinked (this can indicate improper installation and, eventually, could break).
Inspections should also include a close look at electrical components. This includes limit switches, squat switches and indicator switches. You might be surprised to find kinked or frayed wires. Last, while you’re eyeballing the landing gear, it’s also a good opportunity to look at the brake system. Grab the caliper and see if it’s just slightly loose. If you don’t have either Cleveland or McCauley brakes, any looseness could mean trouble. Parker brakes should feel rock solid, so if they wiggle, look for loose bolts. If you do have Clevelands or McCauleys, they should feel slightly loose. This shows that the calipers are still free to slide on the anchor pins, meaning both sides of the brakes are working. Also, be sure the anchor pins themselves are clean and free of rust (if not, make a note to clean them up). Hit those pins with a shot of dry silicone lubricant. You want to use a dry lubricant so it doesn’t attract dirt, which WD-40 will.
On to compass swings. FAA Advisory Circular 43-215 deals with the specifics of calibrating a magnetic compass and it’s worth a read. If you calibrate one on your own, technically it should be supervised and signed off by an A&P although that often doesn’t happen. After all, the Advisory Circular says that certificated airframe mechanics and FAA repair stations with appropriate ratings are authorized to perform compass swings. Still, some techs we talked with said they would consider signing off an owner-performed compass swing if the correction card was filled out properly.
The easiest way to calibrate your own compass is to find an official compass rose, which is an interference-free area on an airfield with markings for lining the aircraft up and making adjustments. The rose is oriented to magnetic north, while cardinal points are normally painted 30 degrees apart. Use a brass screwdriver to adjust the compensating magnets in the compass. Put the aircraft exactly on magnetic north and adjust the N/S compensator screw until the compass reads 0 degrees. Turn the aircraft and put it on east and adjust the E/W compensator until the compass reads 090 degrees. Continue by placing the aircraft on 180 degrees and with the N/S screw, remove half of the south heading correction. This will throw off the north correction, but the error will now be divided equally between the two headings. Last, go back to west and adjust the E/W screw to remove half of the west error. Keep the power up and avionics and lighting on to simulate cruise flight. Fill out the compass correction card. You want no more than 10 degrees of error.

