Electroair EIS Install on a Bonanza

The latest field report after retrofitting Electroair’s electronic ignition once again proves that a logical physical installation should be the top priority.

Electroair EIS and wiring on the Bonanza’s upper left area of the firewall, replacing the right magneto.
That’s the EIS and wiring on the Bonanza’s upper left area of the firewall, replacing the right magneto.

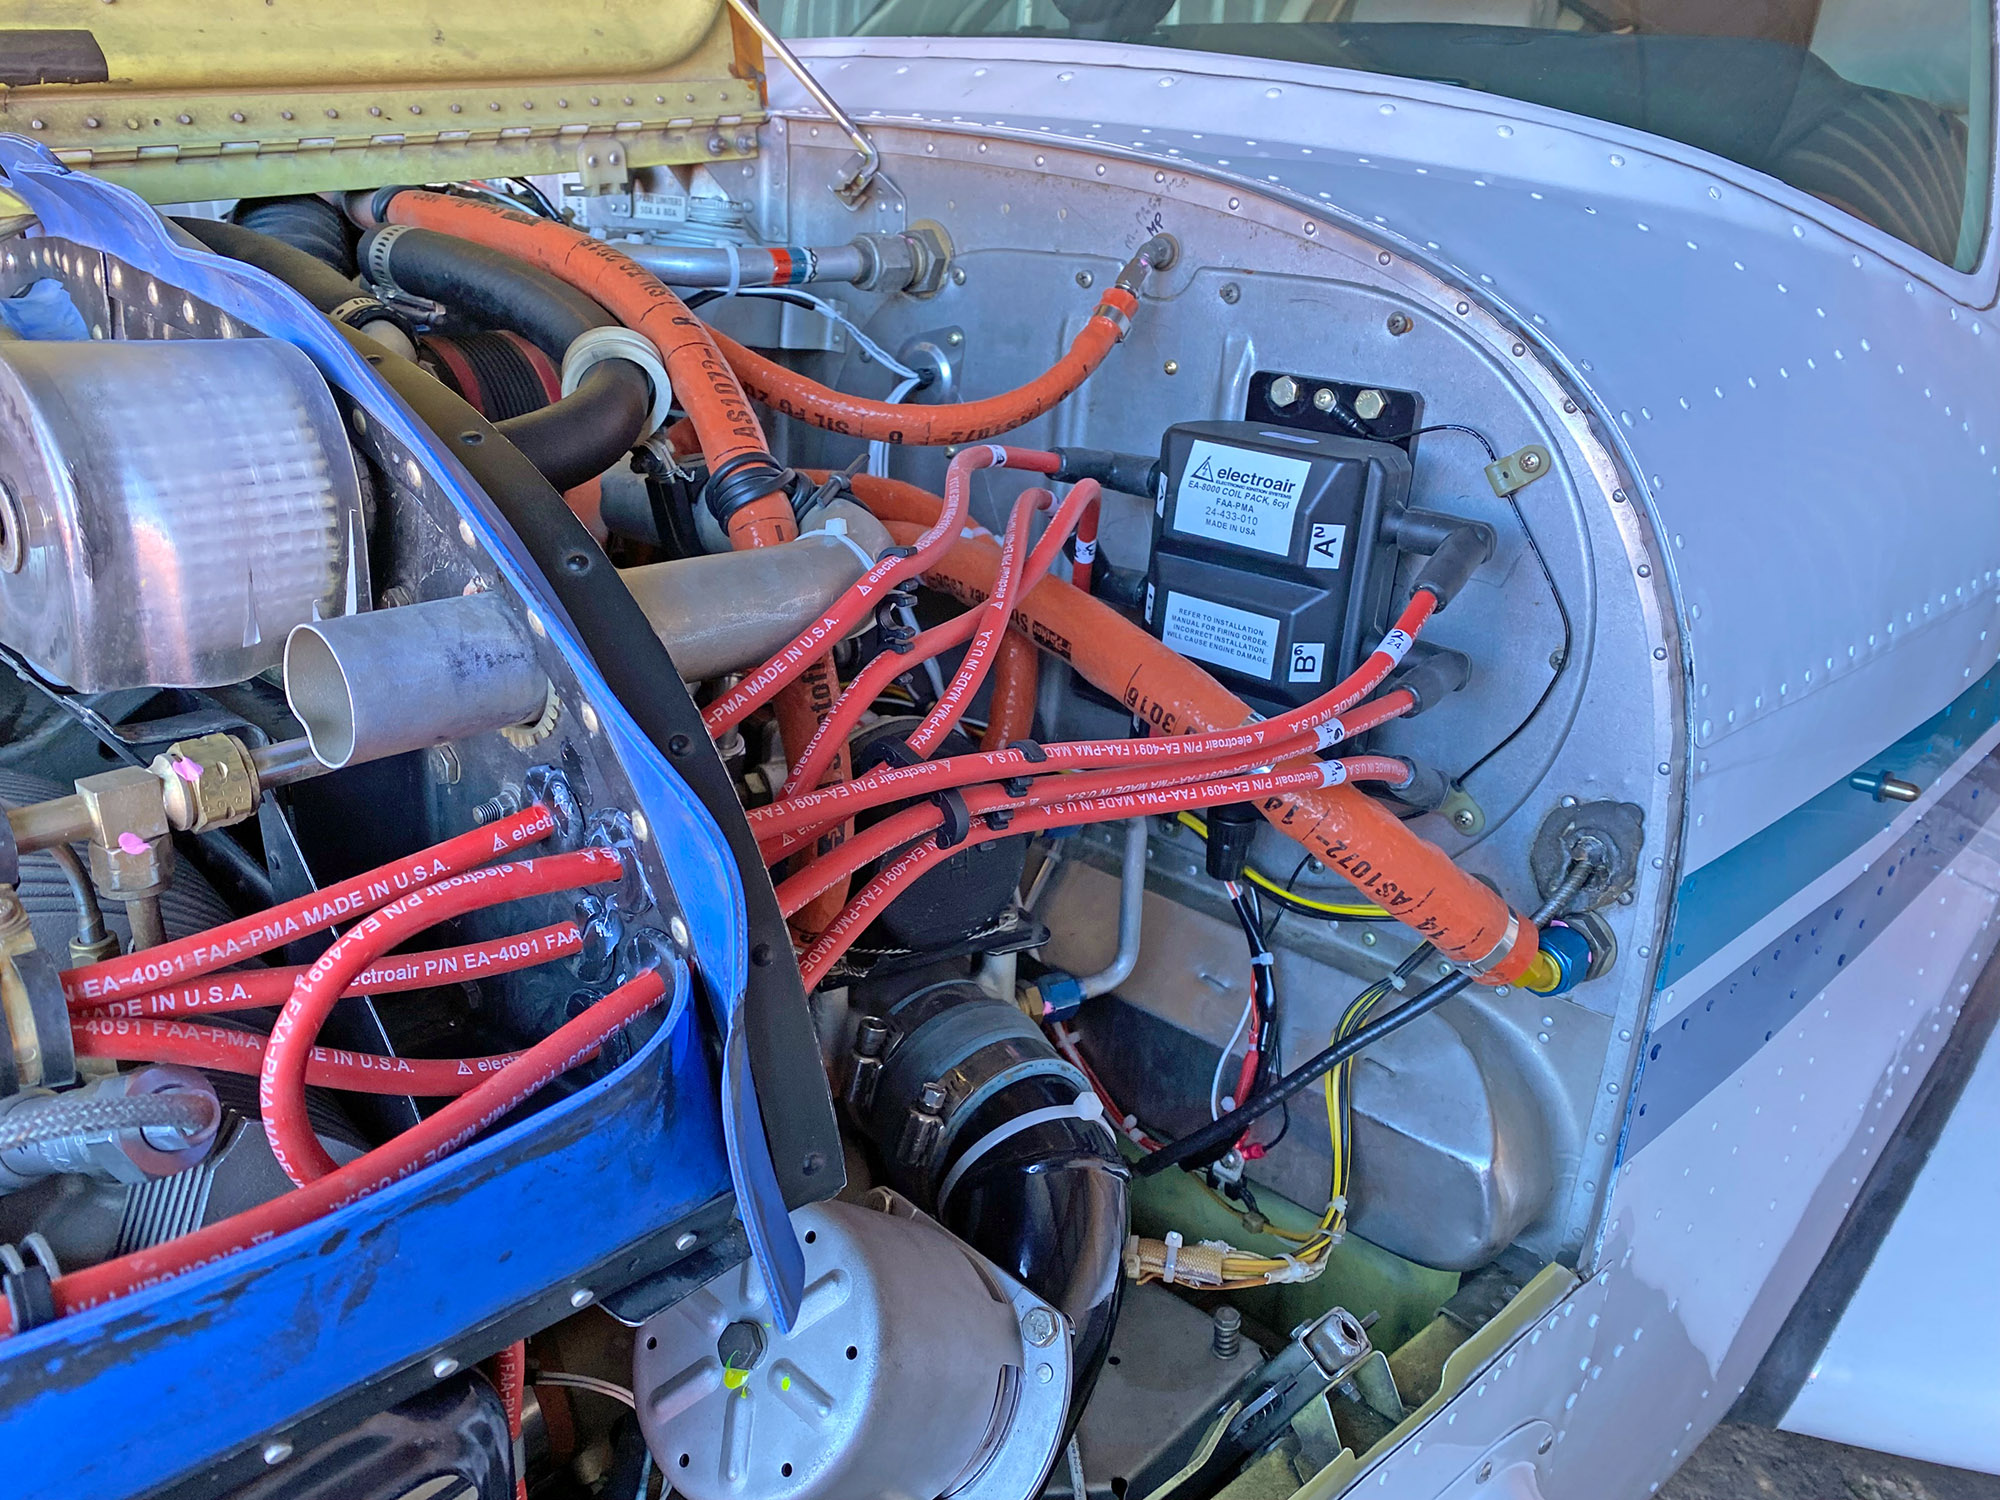
Moving back into piston-single ownership with a turbocharged B36TC Bonanza from our Beech Baron, several upgrades are in the queue to bring her to the level we desire. The first upgrade was installing the Electroair ignition system.

While the installation is straightforward, during the process I uncovered some quirks about the system that might create problems for others contemplating it for their bird.

Not a drop-in

After reading every relevant review of the system I could find (read the most recent Aviation Consumer reports in the June 2022 and October 2023 issues), I concluded the return on investment was in the neighborhood of 300 hours. With a 200-hour Continental TSIO-520 engine installed, the cost of this upgrade made sense. The first question of significance was where to put everything.  There are three primary components to the Electroair system: the controller, coil pack and (in our version of the system) magneto timing housing, or MTH (the timing sensor).  The MTH was seemingly easy because it goes where the removed magneto was located. The left or right mag position doesn’t matter—the system is supposed to work in either position.

Electroair coil pack
Mounting the EIS coils on the firewall access plate means easier access when they need to come out.

The controller and coil pack were a bit more challenging.  The engine bay of the Bonanza doesn’t exactly have a surfeit of room to put things, particularly in a turbo model like ours (turbonormalized may be similar in this regard). After a lot of trial fitting, the access panel for getting behind the instrument panel worked out to be the best location.  Electroair wants the controller away from the heat, so it was mounted to the aft (cabin) side of the panel, while the coil pack was attached to the forward side. To ensure access to the instrument panel could be maintained for future needs, the panel also has the firewall pass-through for the system wiring harness. Adding in quick-disconnects at strategic locations in the harness allows the panel and EIS components to be removed as one unit, which means minimal disassembly.

While the system will work with massive electrode or fine-wire spark plugs, I opted to use fine-wire plugs for the EIS and retain the massives for the traditional magneto. Electroair recommends running its system on the lower plugs in all cylinders to further help with more complete combustion. As my engine is also intercooled, access to those lower plugs on the left side is a real challenge, so anything I can do to reduce the need to work on them is a plus. Admittedly, this arrangement looks a bit odd at first, but it does make identifying the two ignition systems easier.

Two options for controlling the system are available. One can tie it into the existing keyed ignition switch via the appropriate P-lead, or a dedicated switch panel can be installed (this is what Electroair prefers). Both configurations are approved. I chose to use the first option, primarily because the current instrument panel arrangement doesn’t have the room to support the Electroair switch panel. This also required a separate power switch for the system.

In general, I’m not a fan of fuses over circuit breakers—often installed by techs who could have gone the extra distance by considering the pilot’s interaction with the system. As a result, fuses invariably get put in locations completely inaccessible even to the mechanic, let alone the pilot. Sometime, however, they can be unavoidable. In our case, there were several unused spare fuse locations above the battery. As no spare circuit breaker locations were available, I elected to use fuses; there’s one for the controller and another for the coil pack. Both get tied to the switched battery bus.

Electroair MHS
That’s the magnetic timing sensor

Timing sensor snag

Circling back to the MTH, this is where a gotcha reared its ugly head. Initially, I installed the timing sensor in place of the left magneto, principally as an attempt to improve cooling airflow to the number two cylinder, which tends to be one of the hottest (typical of Bonanzas). However, the engine wouldn’t start.

In the process of troubleshooting, I learned two key points, either of which could create a problem. First, the EIS doesn’t start doing its thing until the engine reaches 60 RPM during the start.  While I didn’t try to measure it, I question whether a big-bore Continental ever reaches 60 RPM on the starter alone, especially with a cold or partially discharged battery.  Second, the Continental TSIO-520 in our Bonanza has start assist components (i.e., start vibrator or impulse coupling) only on the left magneto—which is the one I removed. Of the four aircraft we’ve owned, this is the only one that didn’t have that feature on both magnetos.

Contemplating the options, I elected to move the MTH to the right magneto position and reinstalled the left mag, solving the starting problem.

Electroair ignition controller

Smooth-running

My first impressions with the now working EIS are very positive.  While the engine is no easier to start, once it’s running she’s butter-smooth and idles perfectly at 550 RPM. Gone are the occasional misfires so common with magnetos. On runup, there is no discernible drop in RPM on the EIS alone as with magnetos. Running on the right magneto alone produces the normal 50-RPM drop one would expect. The engine accelerates better as well.

I haven’t noticed any performance difference in takeoff and climb. You still need to bring in the takeoff power slowly to let the turbo spool up and not over-boost the engine. What is apparent, though, is the smoothness of the engine. While it was smooth prior to installation of the Electroair system, it is even more so now.

In fact, in cruise the dominant noise source is now the slipstream. With the reduced engine vibration, engine noise somewhat disappears into the background. I find myself glancing at the engine instruments more often just to make sure it’s running!

Having now made several two-hour flights at altitudes between 8000 and 17,000 feet, the engine will readily accept leaner mixtures. Between the GAMIjectors and the ignition system, LOP operations are easily possible. At my typical 28 inches MP and 2300 RPM, cruise fuel burn is consistently 14 to 14.5 GPH, depending on temperature and altitude—down from 15 to 16 GPH. This is an improvement of about 0.5 GPH versus just having the GAMIjectors. All this while still maintaining or exceeding POH performance values.

The CHTs are more challenging to manage. I’m finding the need to keep the boost pump on for a little extra fuel-cooling in the climb.  This was somewhat expected given the more complete combustion of the fuel/air mixture in the cylinder versus the exhaust system. The EGTs are lower, but most noticeable is TIT (turbine inlet temperature), which is now 75 to 100°F lower in cruise (usually around 1550 degrees F). That’s a boon for turbo life. The folks at Smooth Power advised this would likely be the case and they were right.

I’m pleased with the system. It does exactly what was claimed and there have been no nasty surprises. The observed operational improvements are significant and one might argue that is reason enough to install it. They, and the nature of the installation itself, promise to reduce the maintenance costs over the life of the engine. With real-world numbers now in hand, my initial estimation of ROI appears to be spot-on. That’s a win in my book.