For the owner who’s invested thousands of dollars for a high-end audio system upgrade, electromagnetic interference or EMI, is a frustrating and common problem.
While it’s natural to point the finger at the shop who just performed an otherwise high-quality avionics installation, there’s a good chance the source of the noise has been there all along—and now amplified by the clarity of a new audio system and ANR headsets. Unfortunately, this could mean extra repairs that weren’t budgeted for.
In this article, we’ll look at the common sources of electromagnetic interference and popular noise suppression products that could eliminate most of it.

Charging System Woes
It’s easy to blame the aircraft alternator for audio noise. In older aircraft, charging systems are expected to support more avionics equipment than initially intended. An aircraft that has a stock, 60-amp alternator, for example, might not be up to the challenge of efficiently supporting the current draw of new avionics.
While it’s a good idea to consider an alternator upgrade, STC eligibility often limits this option. In alternate, it’s imperative to keep the system healthy, while respecting the current draw of proposed avionics, particularly for lesser electrical systems.
Alternator noise is commonly recognized as a high-pitched whine in the headphone audio. It almost always changes in pitch with change in power settings or RPM. The whine may get worse or might only be present when transmitting on the comm radios. When the alternator and its internal diodes is the culprit, the whine usually gets worse under the heavy electrical load of exterior lighting, blower motors, pitot heat and radio transmitters.
Alternator whine is also caused by poor electrical connections at the aircraft battery. Speaking of the battery, corroded terminals and cables, and even a faulty cell, can be a source of noise.
In some cases, alternator noise can be easy for pilots to troubleshoot, especially in aircraft with split alternator and master switches or a pullable alternator circuit breaker. Take the alternator off line, and the noise should go away. But for shop-level troubleshooting, you’ll need a shop that has the ability to troubleshoot down to the component level, including the ability to analyze the alternator output.
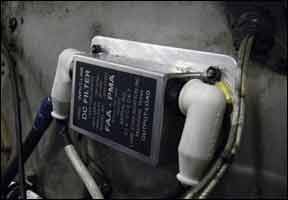
The first thing a shop might do if they suspect alternator noise is inspect the alternator noise filter. This is a capacitor that’s connected on the alternator power output. These capacitors suppress RF noise and the harmonics which comes from the diodes inside the alternator. The health of this filter should be checked during annual inspection, but it’s often overlooked.
It’s important to note that swapping an alternator with a remanufactured unit might not solve noise issues. The diodes in the replacement unit may be noisier than the old one it replaces.
One step in troubleshooting an alternator is connecting an oscilloscope on the output line and measuring how much AC, known as ripple noise, is present on the line. Unfortunately, not all shops are equipped with oscilloscopes and other charging system diagnostic equipment.
Problems downline of the alternator might present symptoms which are far more difficult to pinpoint, perhaps sending technicians in the wrong troubleshooting direction. We know of a Cessna 150 that developed what the pilot referred to as loud static in the headphone and cabin speaker circuits. After multiple test flights, it was determined that the loud static was actually the comm radio opening squelch, even though the squelch was adjusted to the proper sensitivity threshold.
In the process of turning systems on and off in flight, the tech found that while the electrical system was under the heavy load of landing light, pitot heat and other sources of electrical draw, the squelch would remain closed. In the end, it was an overvoltage condition that induced so much noise into the comm radio receiver that it opened the squelch— mistaking interference for receiver signal. To make matters worse, the pilot failed to recognize the overvoltage lamp illuminating on the other side of the panel because it was too dim. After days of troubleshooting radios and audio system components, the aircraft ultimately needed a trip to a maintenance shop—not an avionics shop. Be sure to do as much in-flight troubleshooting as you can before handing the aircraft to a shop. It could save you money.
wiring matters
Aircraft audio wiring is highly susceptible to numerous sources of EMI and RMI interference. This includes lighting systems, blower motors, flap and landing gear motors, autopilot servos and comm radio transmitters, to name a few.
Poorly maintained and non-shielded wiring is especially susceptible to interference and nuisance noise. Avionics upgrades should be the time to address poor ground connections, wire splices, frayed shielding, corroded connectors and improperly routed wiring bundles.
Unfortunately, competitive bidding on the shop level isn’t always good for the customer. Be mindful of projects that may be low-balled, as they might not include a complete rewire job. While it can be completely acceptable to utilize existing wiring with newly installed equipped, it’s not acceptable to splice into substandard audio wiring just to save time and labor dollars. Ask the shop how much of the new wiring will be utilized and what, if any, options exist for replacing existing wiring.
The same can be said for antennas and coaxial cabling—another source of audio noise. Most new fiberglass antennas are treated with an anti-static coating. This invisible top coat helps prevent static buildup, but as the antenna ages, the coating breaks down and you might notice annoying static in the comm radio reception when you fly in static-inducing weather conditions.
In many cases, the signal cabling connecting the antenna to the radio could be as old as the aircraft and subject to deterioration and wear from years of rattling around. Consider, too, that old coaxial cable is likely non-shielded RG58 or older and could be the source of interference that’s worked into the radios and audio system. The standard practice these days is to install twin-shielded, low-loss cabling—an effective way of eliminating RF interference.
ignition noise
Interference from ignition components—including arcing magnetos and ignition lead noise, might present itself as pops in the headphones. This might be a symptom worth watching closely.
Consider a Piper Arrow with an otherwise noise-free audio system, including new avionics wiring and a PS Engineering audio panel. At certain power settings, there was a noticeable crackle and pop in the headphone audio. During engine run-up, the popping would go away when switching magnetos. The engine ran fine until a half hour into flight, and then it ran rough. Ultimately, the problem was a faulty magneto coil. When magneto coils fail, they often break down when they’re hot, which was the case of this failing magneto which, other than noise, exhibited no symptoms during a mag check.
Lone Star offers a feed-through design magneto filter, which is FAA and PMA approved, and attenuates the low—and high frequencies noise of Bendix ignition systems.
From our experience, it’s often unnecessary to install magneto filters as long as shielded leads are used and the shielding is properly grounded at both the magneto and the ignition switch.
Bringing It In
When tackling noise problems, it’s not uncommon for owners to bounce from maintenance shop to avionics shop or vice versa. Some avionics shops simply don’t want to deal with noise issues because they know the problem isn’t related to avionics. On the other hand, some maintenance shops just aren’t comfortable dealing with avionics problems. This game of service ping pong is frustrating for the owner who just wants to have the problem solved.
Some avionics shops have experienced airframe and powerplant technicians on staff who might be versed in charging system problems and their effect on avionics performance. Lone Star offers a noise evaluation kit, which contains a variety of noise suppressors. When equipped with this kit, shops can qualify the proper noise filter for a particular problem.
Speaking of solving problems, while there are excellent noise filtering products that can make good audio sound even better, you’re setting yourself up for disappointment and more frustration by expecting a filter to correct problems related to old wiring and failing electrical components. Our advice is to solve the problem first and then add filters to get rid of minor audio imperfections.

